
Introduction
When you spot peeling paint, soft spots, or little cracks on your porch railings, it is easy to panic and search for a quick fix. Take a breath. With the right exterior wood filler, you can save trim, siding, and deck railings without calling a contractor. In this guide, I will walk you through choosing the best exterior wood filler, how to apply it like a pro, and the simple habits that keep your repairs looking fresh. We will cover what to use where, how to match color, and the tricks that make a filler for exterior wood blend in so well that even your closest DIY friends will ask what you did.
The secret to success is less about being perfect and more about picking the right product for your climate, the right prep, and a calm, patient approach. Whether you are fixing window sills before listing your house, sealing knot holes before exterior paint, or shoring up a weathered door frame, the right wood filler exterior choice can give you a long-lasting, paintable, smooth finish that stands up to sun, rain, and winter freezes. This is the guide I wish I had when I faced my first crumbly porch column on a sweltering July afternoon.
Understanding Exterior Wood Fillers
What is Exterior Wood Filler?
Exterior wood filler is a repair compound designed to patch holes, cracks, and rot in wood that lives outside. Think of it as a sculptable, sandable material that bonds to the wood fibers, dries hard, and creates a stable base for primer and exterior paint.
Unlike interior spackle or lightweight putty, exterior wood filler is formulated to handle movement, moisture, UV exposure, and temperature swings. In practical terms, that means it will not crumble when your siding expands in summer heat or contract in cold snaps. The best exterior wood filler cures dense and durable, resists water intrusion, and takes paint like a champ.
Importance of Choosing the Right Filler for Exterior Projects
Not all fillers are created equal. A product that is perfect for small nail holes in interior trim can fail dramatically on a sunbaked window sill. Choosing the right filler for exterior wood determines how long your repair will last, how well it blends, and how much time you will spend maintaining it.
The wrong choice leads to telegraphed patches, blistering paint, and more expensive repairs later. The right exterior wood filler protects the surrounding wood from moisture, prevents future rot, and softens those stress lines where materials meet. Think of it as preventative care for your house, similar to scheduling regular roof inspections or caulking drafts before winter. A well-chosen filler helps protect your curb appeal, which matters for everything from home appraisal to home insurance inspections.
Types of Exterior Wood Fillers
Water-Based Wood Fillers
Water-based exterior wood fillers are user friendly, clean up with water, and tend to have a low odor. They are ideal for shallow repairs, hairline cracks, nail holes, and surface imperfections on trim and fascia. If you are touching up before exterior paint, a water-based filler can be a time saver.
Pros:
- Fast drying, often ready to sand within an hour in warm weather
- Easy cleanup with soap and water
- Minimal odor, more comfortable for weekend projects
- Good for thin applications and light repairs
Cons:
- Not as strong for deep rot repairs
- Can shrink slightly if overworked or applied in thick layers
- May soften if exposed to standing water before fully cured
If you are prepping for a big paint job, a high-quality water-based product is often the best exterior wood filler for speed and ease. Use it for window trim, soffits, or porch skirting where the damage is shallow and stable.
Solvent-Based Wood Fillers
Solvent-based fillers are stronger and more weather-resistant than most water-based options. They contain resins that cure hard and hold up well to exterior abuse. If you have larger gouges, deeper cracks, or areas that see frequent contact, this is a solid choice.
Pros:
- Strong bond and durable finish
- Less shrinkage than many water-based products
- Sands to a smooth, paint-ready surface
- Better moisture resistance than typical water-based fillers
Cons:
- Stronger odor, requires ventilation
- Solvent cleanup can be messier and requires mineral spirits
- Slightly longer working time, which can be a pro for shaping
Choose solvent-based filler for high-wear areas like door jamb edges, stair tread noses, or frames that get scuffed by pets and gear. If you need a dependable filler for exterior wood that can handle more punishment, solvent-based is a safe bet.
Epoxy Wood Fillers
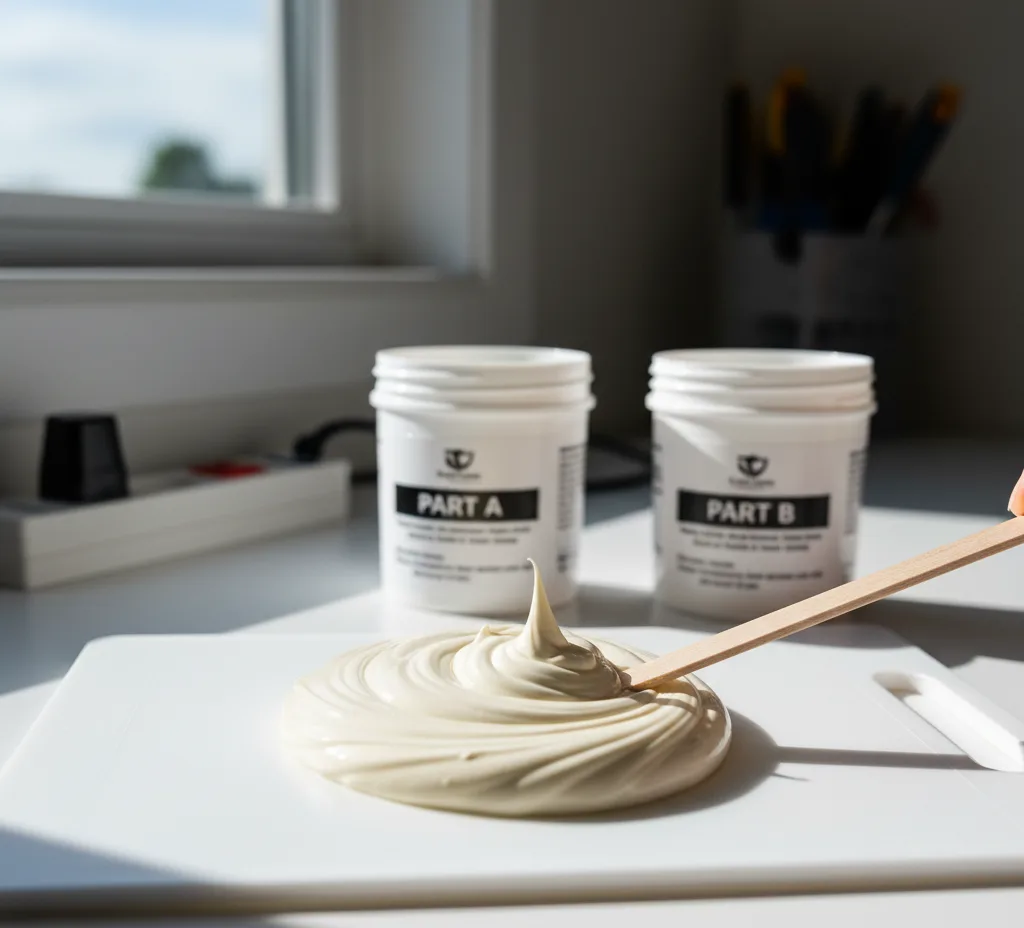
Epoxy fillers are the heavy lifters of the exterior world. They are typically two-part systems that you mix before use. When cured, they are incredibly tough, moisture resistant, and perfect for structural repairs where wood has rotted or lost integrity. If you have rot in a window sill, an exterior door threshold, or the base of a porch column, epoxy is often the best long-term fix.
Pros:
- Exceptional strength and stability
- Superior water resistance, ideal for rot repair
- Can be shaped, carved, sanded, and drilled
- Long working time to sculpt details and match profiles
Cons:
- Requires careful mixing and measuring
- Longer cure times, especially in cool weather
- Usually pricier than other fillers
- Best results come with a compatible wood hardener or consolidant first
Epoxy is the go-to for significant repairs. Once cured, it creates a stable substrate that resists future water intrusion. It is a favorite of pros who restore historic wood windows and doors, where preserving original material matters.
Caulks and Sealants as Fillers
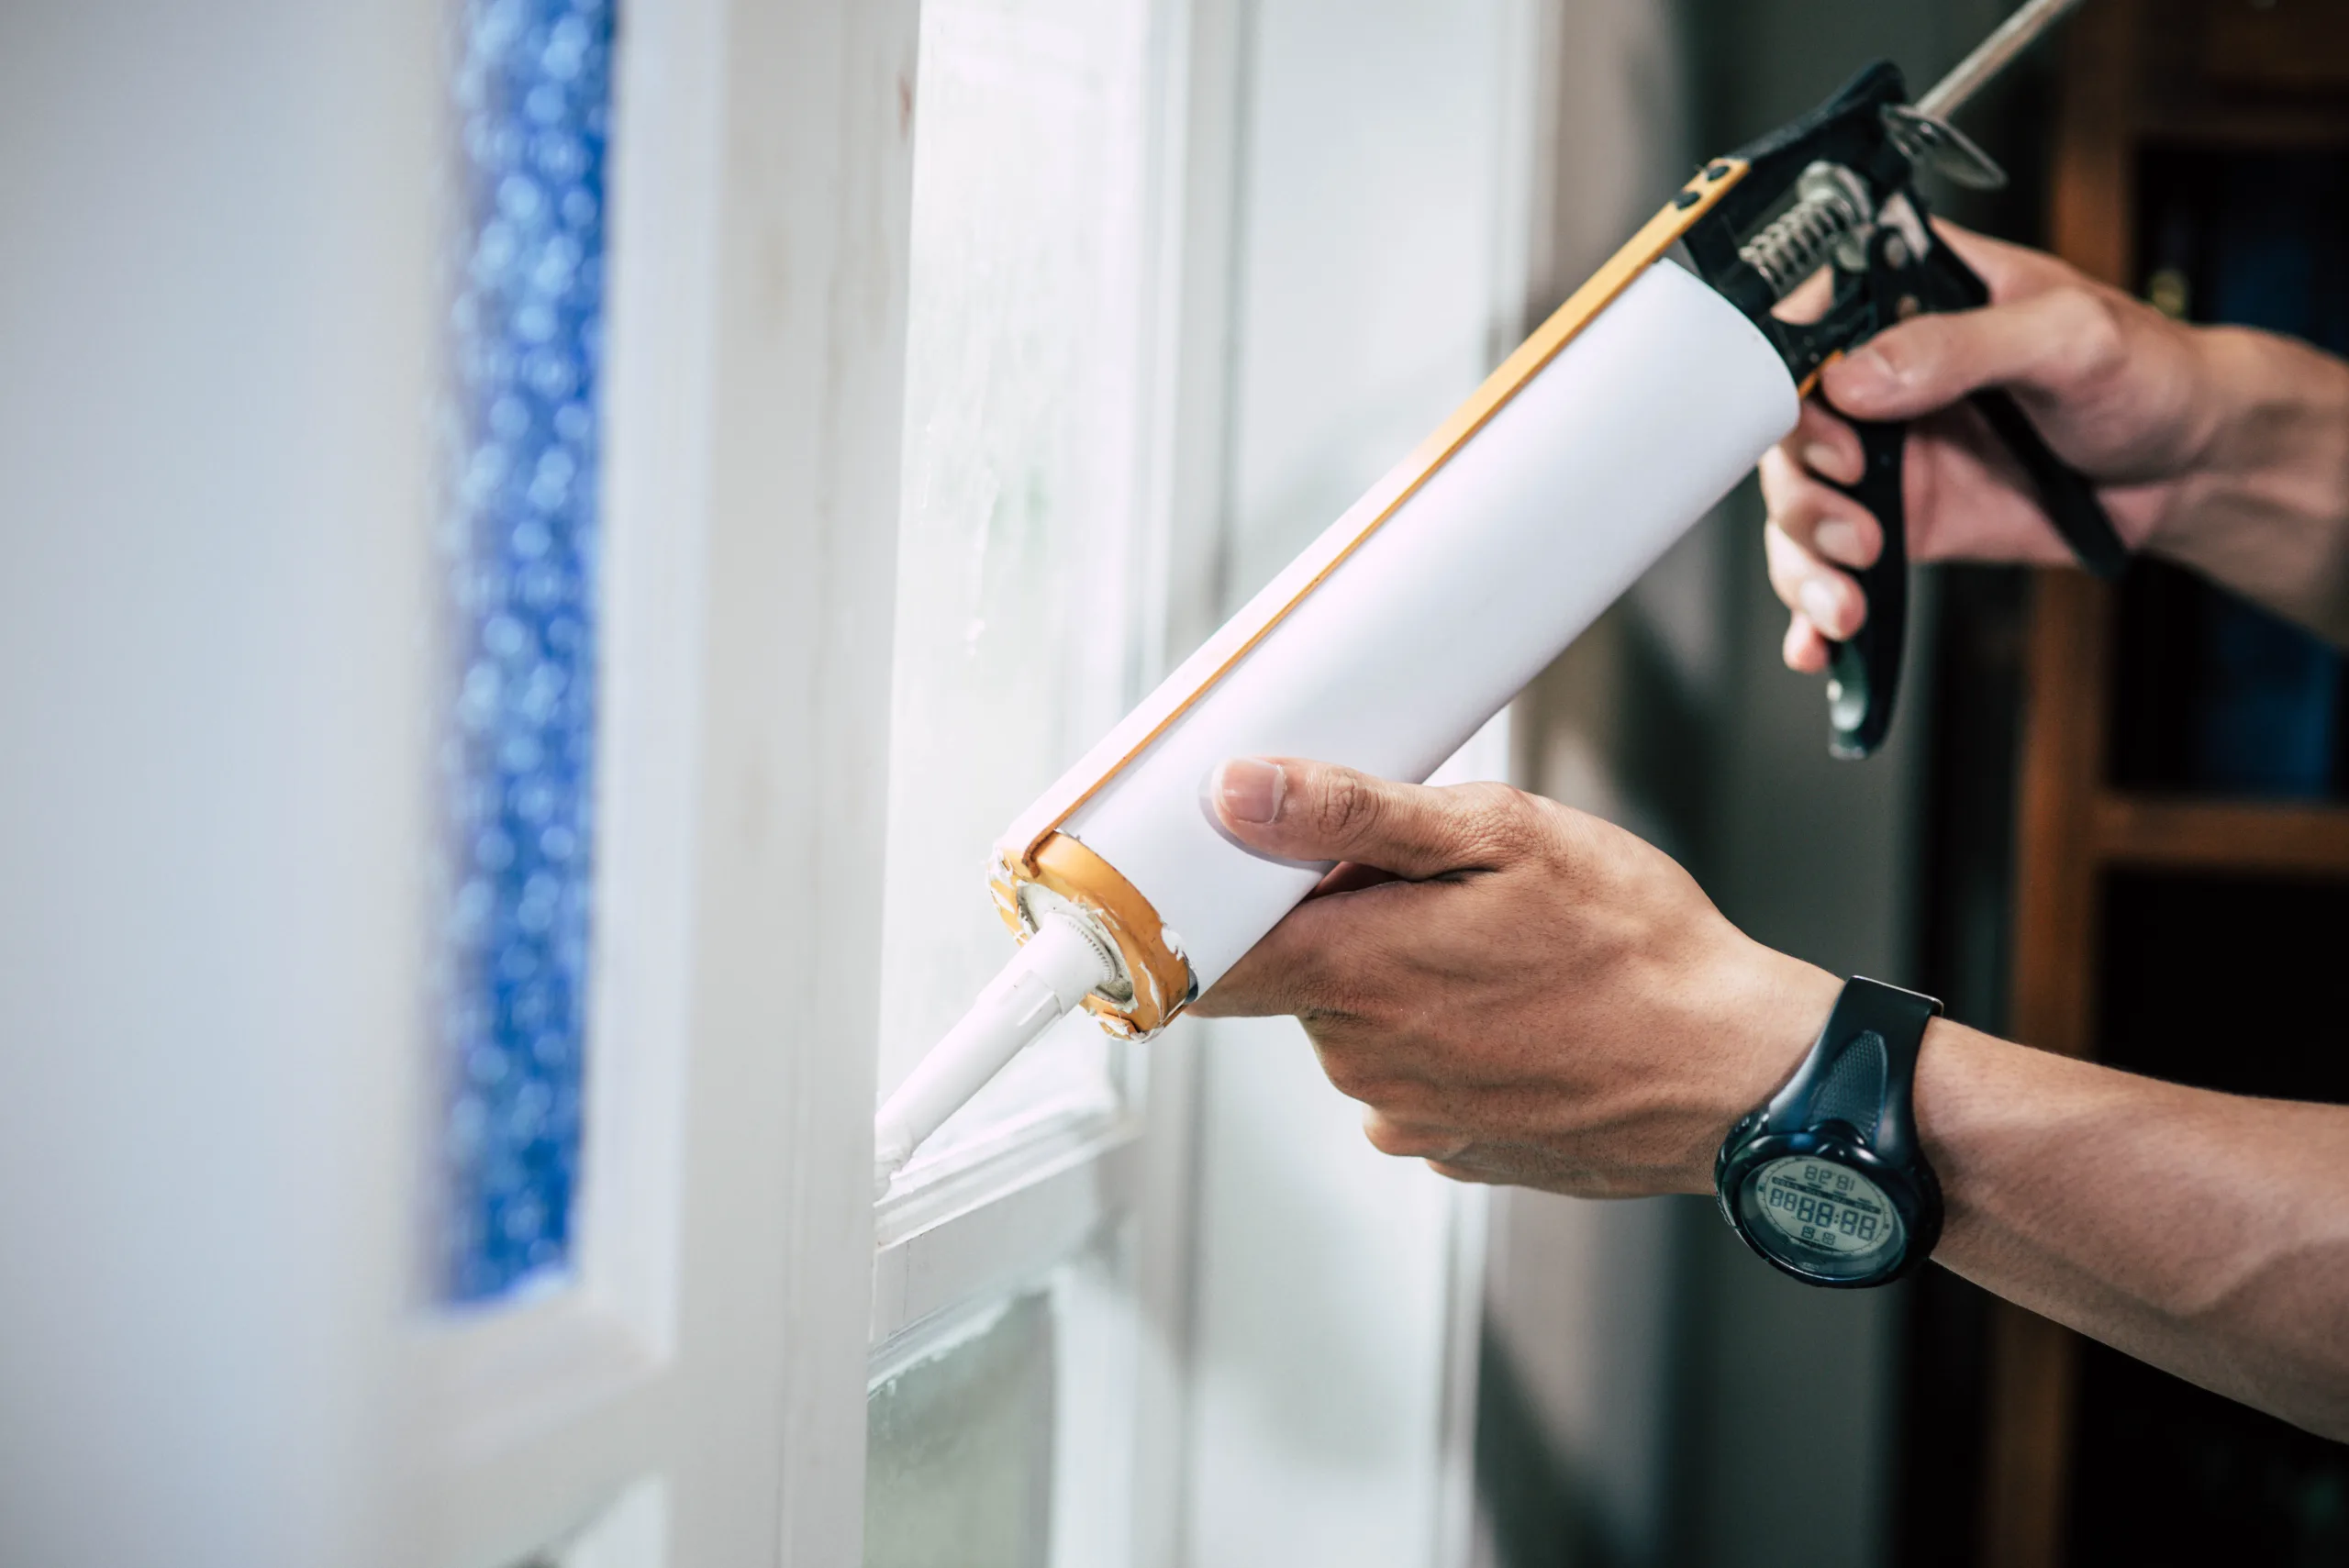
Caulk is not a wood filler, but some exterior-grade sealants can play a supporting role. Use flexible, paintable exterior caulks to fill moving joints, gaps where two materials meet, or places where expansion and contraction are expected. For instance, where siding meets a corner board, or where trim touches masonry, a high-quality siliconeized or polyurethane sealant works better than a rigid filler.
Pros:
- Stays flexible to handle movement
- Excellent at sealing out water and air
- Paintable options blend into trim and siding
Cons:
- Not sandable
- Not suitable for shaping or sculpting profiles
- Can attract dust if not smoothed properly
Think of caulk as your waterproofing partner. Use a true exterior wood filler for shaping and surface repair, and use caulk to seal the edges and joints where movement would crack a rigid fill.
Factors to Consider When Choosing the Best Exterior Wood Filler
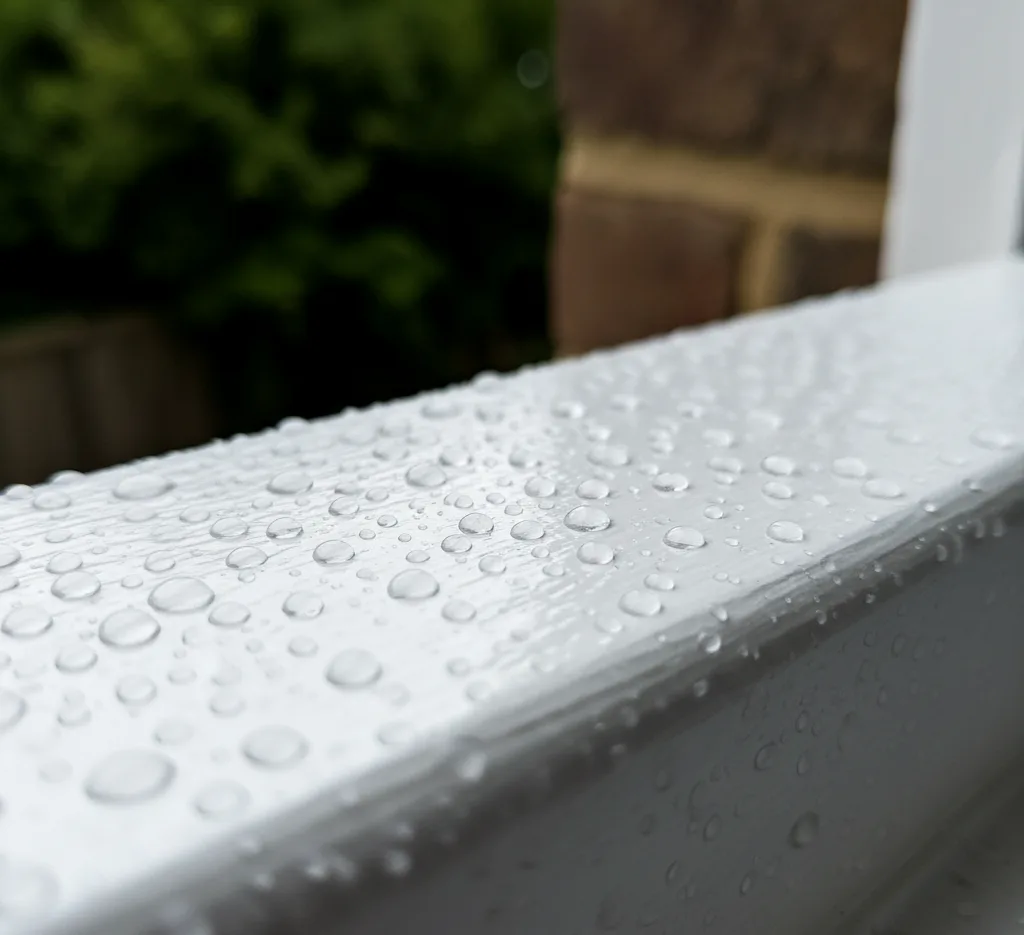
Environmental Resistance
Climate matters. If you live in a rainy coastal area, a filler with excellent water resistance is non-negotiable. Epoxy shines here, as do high-quality solvent-based fillers. In hot, sunny regions, UV exposure and heat cause movement in wood, so you want a filler that bonds tightly and resists cracking under expansion.
Consider freeze-thaw cycles. In northern states where winters bite, tiny amounts of moisture can freeze within micro gaps and expand, which can fracture brittle fillers. A flexible topcoat and meticulous priming go a long way. Also think about salt exposure for homes near the coast. Salt accelerates deterioration, so a robust, sealed system using a primer and exterior paint rated for marine or coastal conditions can be worth it.
Application Method
Your comfort level with tools and timing should guide your choice. Water-based fillers are easy to spread with a putty knife and sand in a single afternoon. Solvent-based options give you a bit more forgiveness and a tougher finish. Epoxy requires mixing, patience, and a commitment to following directions.
Ask yourself:
- How deep is the damage
- Do I need to rebuild a profile, like a sill nose or decorative edge
- How quickly do I need to paint this repair
- Will I be working in hot sun or cool shade
Your answers guide you to the best exterior wood filler for the job. Shallow imperfections before painting? Water-based. Deep voids and rot? Epoxy. Moderate gouges that need strength but not a full rebuild? Solvent-based.
Color Matching
Most exterior wood fillers are designed to be painted, but color still matters. If you plan to stain the area or leave it natural, choose a filler rated for stain or a tintable option. Many water-based fillers accept tint or come in shades close to common woods like pine, cedar, or oak. Epoxy is typically neutral to off-white or tan and is almost always painted.
If matching stain, always test on a scrap board first. Fill a small area, sand, then stain to see how it takes color. Often, layering stains or using a wood dye beneath the final stain helps the filled area blend better. For painted surfaces, aim for neutral fills that will not telegraph through lighter paint colors. A quality stain-blocking primer is your best friend.
Drying Time and Curing
Dry time affects your workflow. Water-based fillers can be sanded quickly, which is great for same-day painting in warm weather. Solvent-based options may give you a longer open time without rushing. Epoxy has the longest cure time, but it also delivers the longest service life.
Remember that cure is different from dry. A filler may feel dry to the touch yet still be curing internally. Rushing paint over a not-fully-cured repair can trap solvents and lead to adhesion problems. Follow the label, and consider temperature and humidity. If you are aiming for a weekend finish before a home appraisal or new mortgage refinance inspection, plan your timeline so every layer cures properly.
Application Techniques for Exterior Wood Fillers
Surface Preparation
Good prep is everything. This is where your results are made or broken.
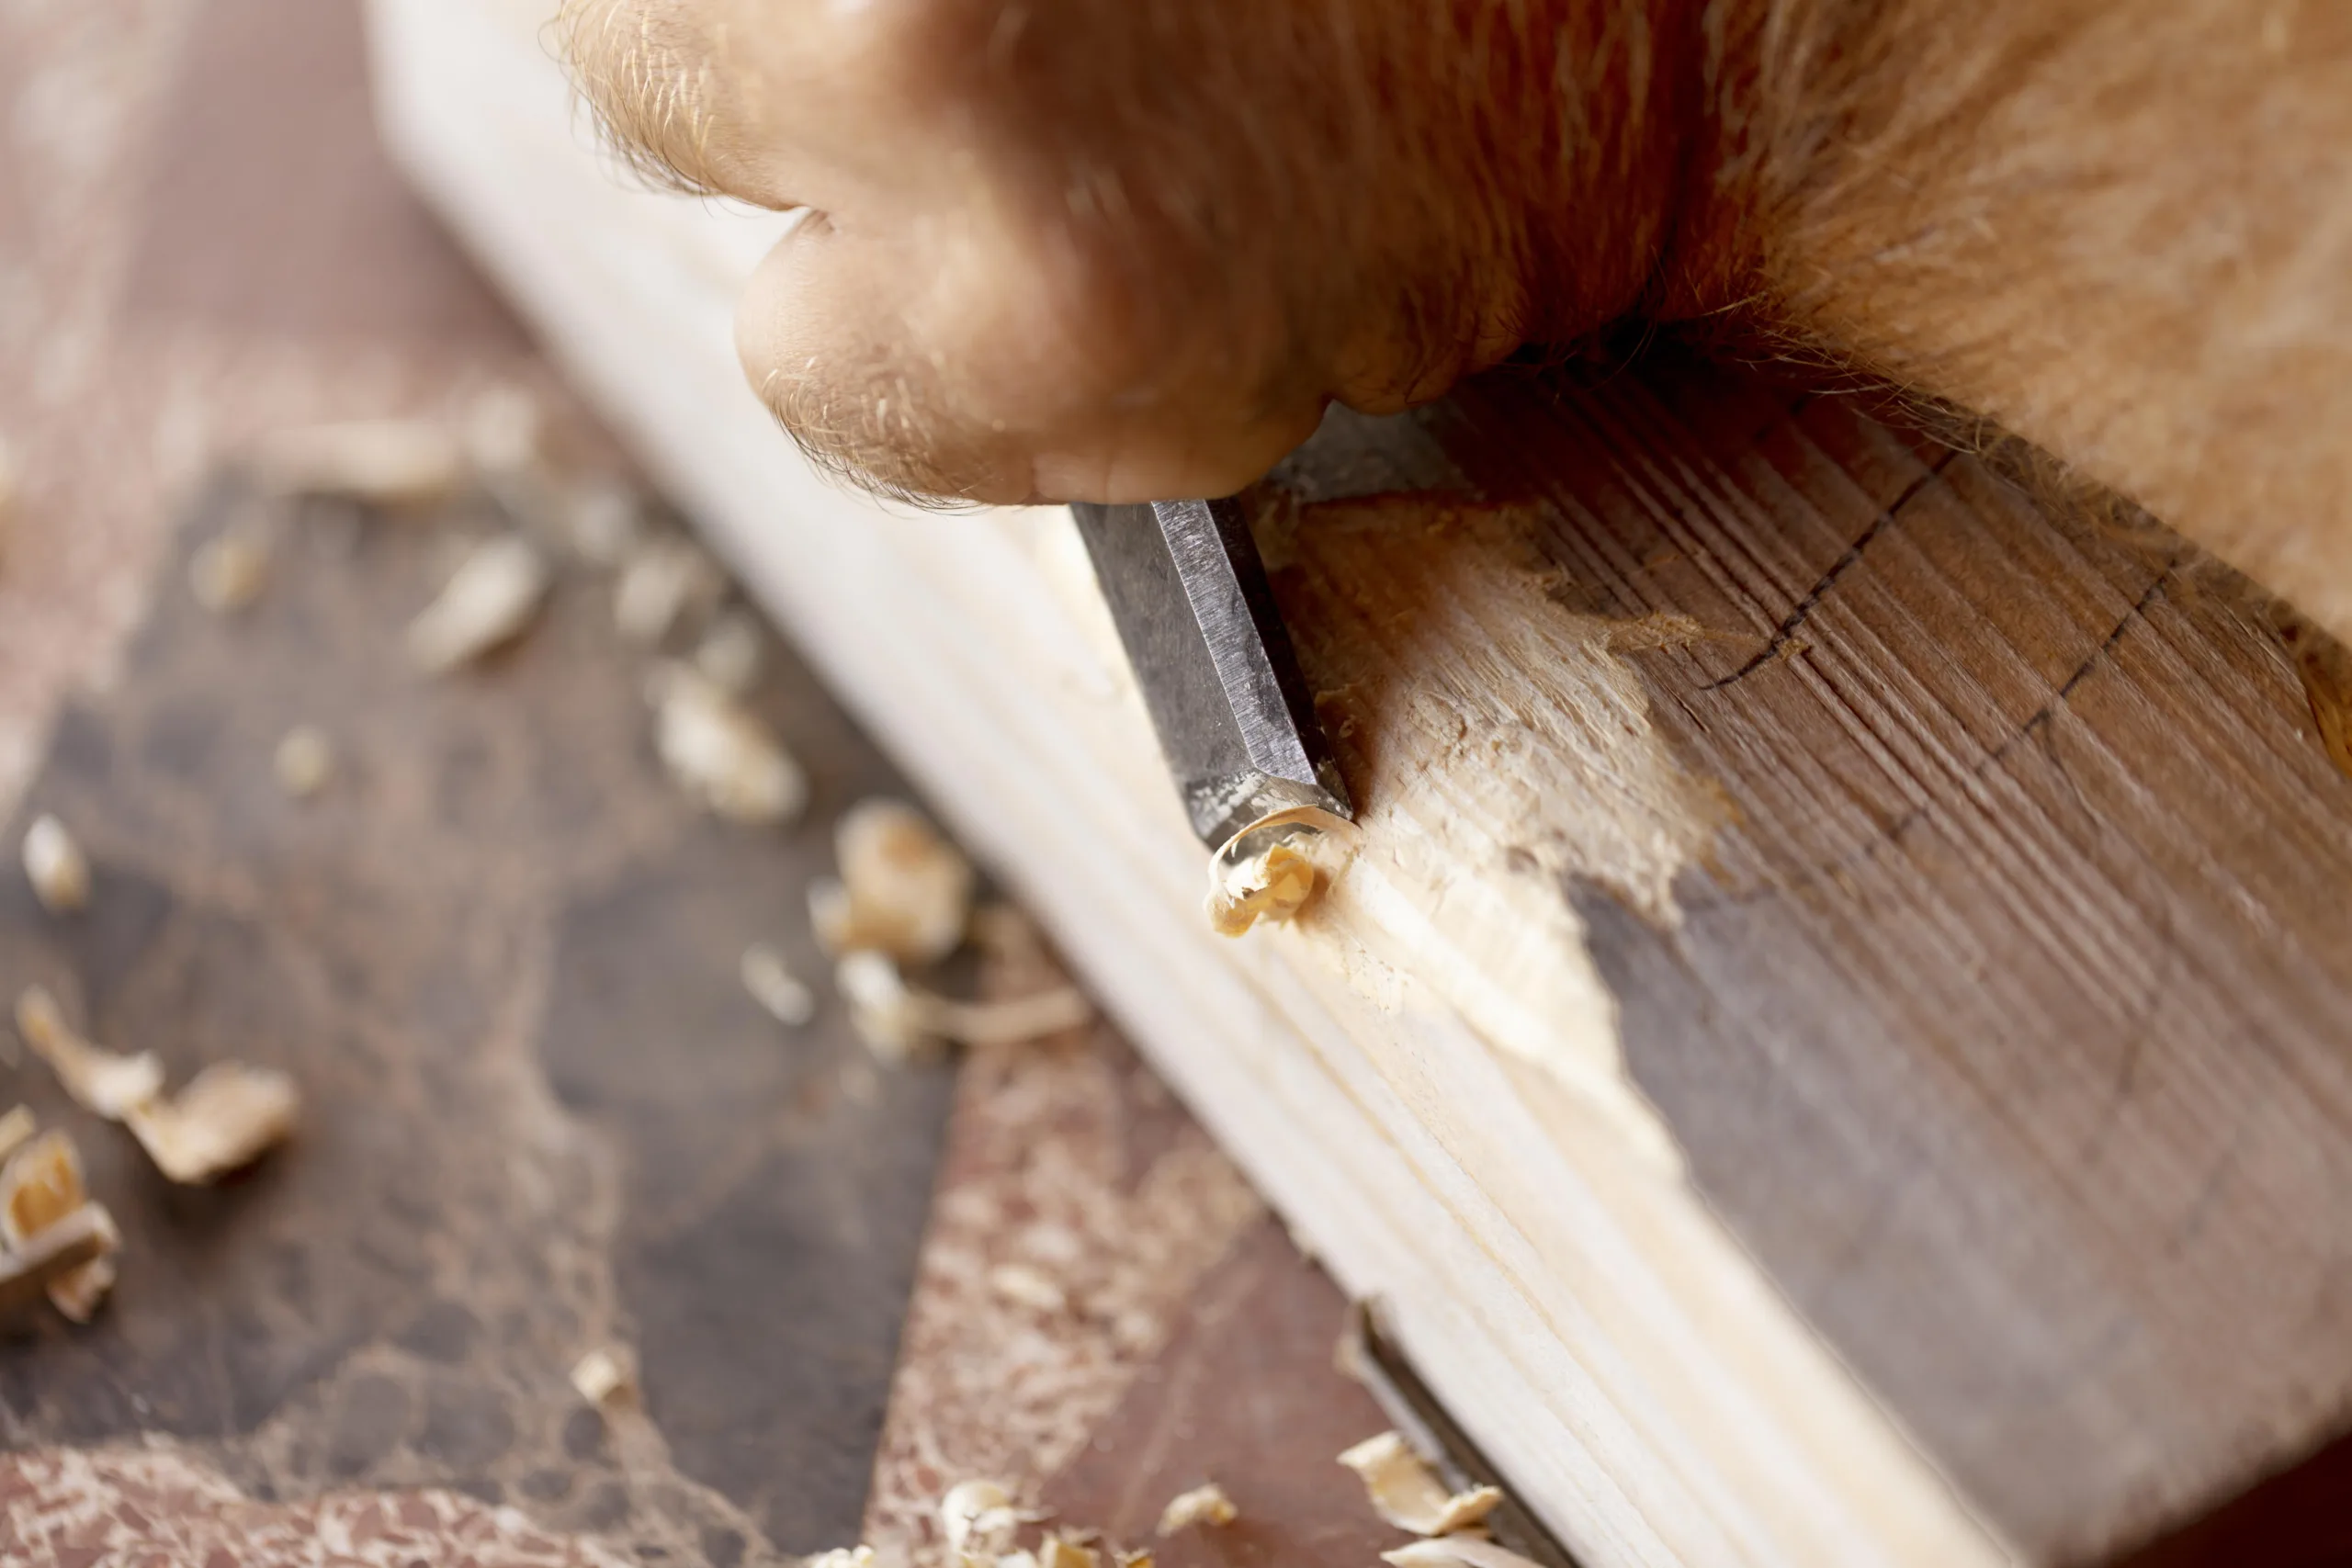
- Remove loose paint and decayed wood. Use a scraper, chisel, or oscillating tool to scoop out soft fibers. Stop when you reach solid wood that resists pressure.
- Dry the area. Moisture is the enemy. If the wood is damp, let it dry in the sun or use a fan. For deeper rot repairs with epoxy, dry wood is mandatory for a reliable bond.
- Treat remaining wood. For rot repairs, brush on a wood hardener or consolidant that soaks in and reinforces the fibers. This step turns a spongy surface into something epoxy can cling to.
- Clean thoroughly. Dust, sap, and oils sabotage adhesion. Vacuum the cavity and wipe with a damp cloth, then allow to dry.
Safety note: If you are working on pre-1978 paint, assume it could contain lead. Use proper protective gear, work clean, and follow EPA Renovation, Repair and Painting guidelines. It is a small effort that protects your home and family.
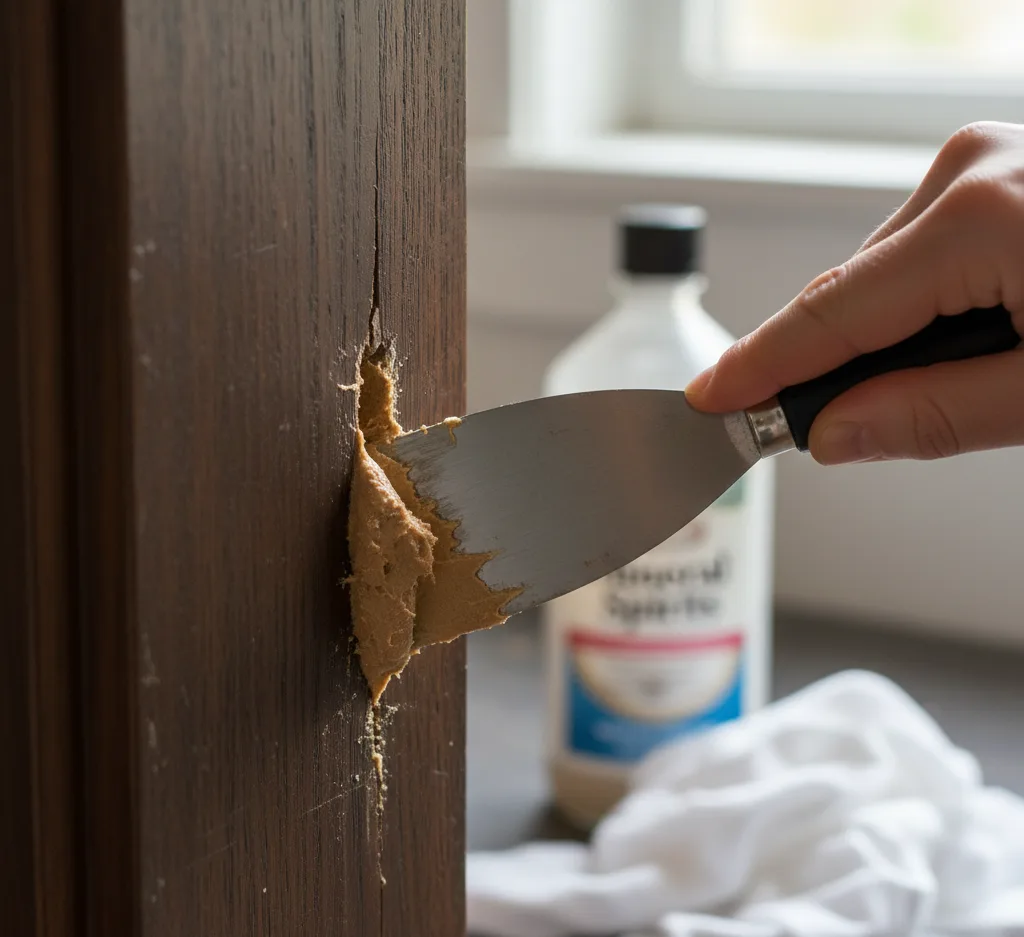
Filling Techniques

Each filler type rewards a slightly different technique.
For water-based and solvent-based fillers:
- Load your putty knife, then press the filler firmly into the void, overfilling slightly.
- Work at different angles to chase out air pockets.
- Smooth the surface so it is level with or just above the surrounding wood.
- For wide areas, use a flexible spreader to maintain a gentle crown that sands flat later.
For epoxy fillers:
- Mix equal parts thoroughly until color is uniform. Scrape the sides and bottom of your mixing board so there are no unmixed streaks.
- Apply with a putty knife, pressing firmly. If you are rebuilding a detail like a sill nose, shape it in stages. Build a base fill, allow it to firm up, then sculpt the final curve with a gloved finger and a plastic spreader lightly misted with denatured alcohol.
- Keep edges feathered. Feathered edges hide better under paint and reduce the risk of a hard transition line.
Pro tip: Create simple forms with painter’s tape or a scrap of thin plastic to guide straight lines and sharp edges. For example, to restore a crisp corner on a column, tape a right angle, fill, then pull the tape as the epoxy begins to set. The result looks like a factory edge.
Sanding and Finishing
Once the filler has dried or cured, sanding brings everything together.
- Start with 80 to 120 grit to knock down high spots, then move to 150 or 180 grit for smoothing.
- Keep the sander moving. Hovering can dish the area and reveal your patch later.
- Wipe away dust with a tack cloth or damp rag and allow to dry completely.
Priming and painting:
- Use a high-quality exterior primer, ideally a bonding or stain-blocking primer. This locks down any remaining tannins and evens out porosity so the topcoat looks uniform.
- Apply two thin coats of exterior paint. Thin, even coats bond better than one heavy coat.
- Caulk any moving joints after primer but before paint. This seals out water, which is the difference between a two-year patch and a ten-year fix.
If you are staining, test the stain on a small, sanded area. Some fillers take stain darker or lighter than the wood. A toner or gel stain can help blend the repair. Finish with a clear exterior-rated finish that includes UV protection.
Tips for Maintaining and Storing Exterior Wood Filler
Proper Storage Conditions
Good storage habits save money and reduce waste.
- Seal the container tightly after each use. Press a layer of plastic wrap against the surface of water-based filler before closing the lid to prevent skinning.
- Store in a cool, dry place. Avoid hot garages in summer or unheated sheds in winter. Extreme temperatures ruin both water-based and solvent-based fillers.
- Keep epoxy parts A and B separate and tightly closed. Label lids clearly, and never use a contaminated mixing stick in the clean container.
- For water-based filler, add a teaspoon of water if it thickens slightly, then mix well. Do not thin solvent-based filler unless the manufacturer allows it.
Treat your filler like you treat exterior paint. If it freezes or bakes in a car trunk, performance will suffer.
Shelf Life of Exterior Fillers
Most fillers have a shelf life of about one to two years once opened, sometimes longer for unopened containers stored correctly. Epoxy components can last years if sealed, but exposure to air and moisture reduces reliability.
Check the label for a manufacture date or lot code. If you use filler infrequently, buy smaller containers so you are always working with fresh product. The cost of a new tub is tiny compared with the time and frustration of a failed repair. Think of it as a smart household expense, like replacing worn weatherstripping or scheduling gutter cleaning to prevent water damage.
Signs of Deterioration
Before you start a project, check your filler.
- Water-based filler that smells sour, has mold, or has separated into a watery layer and a hard lump is past its prime.
- Solvent-based filler that has thickened into rubbery chunks or will not incorporate smoothly after stirring is done.
- Epoxy parts that crystallize or change color can sometimes be warmed gently in hot water and used, but if they will not mix to a uniform paste, toss them.
- Any filler with visible contamination, grit, or skin that mixes into the body will telegraph into your finish and should be replaced.
If in doubt, do a test patch on scrap wood. Let it cure, sand it, and check for brittleness, adhesion, and finish quality. A five-minute test can save hours of rework.
Real-World Scenarios and What Works Best
Because exterior repairs vary, here are common scenarios and the filler choices that consistently deliver.
Window sill with soft, punky wood from years of water intrusion:
Use a wood hardener first, then a two-part epoxy wood filler. Shape the sill nose, sand smooth, prime with a bonding primer, caulk joints, and paint with a quality exterior paint. This combo resists water and handles seasonal movement.Nail holes and minor dents in fascia or trim before painting:
A water-based exterior wood filler lets you move quickly. Fill, sand, spot prime, then topcoat. If the trim gets direct sun, choose a premium exterior paint to limit future cracking.Deep gouge in a door frame or rake board from a ladder mishap:
A solvent-based exterior filler offers strength and easy sanding. Overfill a hair, sand flush, prime, and paint. If the area sees lots of contact, consider a small metal kickplate or edge guard to protect it.Hairline cracks where two boards meet on siding:
Use paintable exterior caulk, not a rigid filler. Caulk moves with the joint and prevents water from sneaking in. Prime and paint over it for a seamless finish.Knot holes bleeding through paint on cedar or pine:
Fill stubborn knots with a water-based filler or shellac-based primer plus filler combination. Sand smooth, prime with a stain-blocker, then paint. This prevents tannin bleed and those yellowish stains that ruin bright white trim.
Tools and Supplies That Make a Difference
You do not need a contractor’s van to get beautiful results. A few well-chosen tools pay for themselves.
- Putty knives in multiple widths, including a flexible plastic spreader
- Sanding block or orbital sander with 80, 120, 150, and 180 grit discs
- Shop vacuum and tack cloths
- Exterior-grade primer and paint, ideally a satin or semi-gloss for trim
- Exterior caulk, paintable and rated for UV and water exposure
- Wood hardener or consolidant for rot repairs
- Disposable mixing boards and sticks for epoxy
- Nitrile gloves, safety glasses, and a respirator when working with solvents
If you are tackling a big project, factor in ancillary costs like primer and paint when you compare the price of fillers. Spending a little more on a better filler can mean fewer callbacks to the store and fewer weekends lost to touch-ups, which matters if you are juggling other renovations like replacement windows, roofing repairs, or HVAC maintenance.
Cost, Value, and Longevity
It is tempting to pick the cheapest filler on the shelf, but value is about lifespan. A budget water-based filler might be perfect for tiny nail holes under a covered porch, while epoxy belongs in areas that see standing water or constant sun. If your project is part of a larger exterior refresh with new exterior paint, consider the total investment. Spending slightly more on a premium filler protects your paint job, which is often the largest expense.
If a major inspection is on the horizon, whether for home insurance renewal, a refinance, or a real estate listing, choose the most durable option you can apply confidently. Buyers and inspectors notice cracks and soft spots around door thresholds and sills. A smooth, solid repair telegraphs a well-maintained home and can improve first impressions more than you might expect.
Common Mistakes to Avoid
- Skipping primer. Even the best filler for exterior wood needs a proper base coat to lock everything down.
- Overfilling without feathering edges. A hard ridge is difficult to hide once paint goes on.
- Rushing the cure. Give fillers the time they need, especially in cool or humid weather.
- Ignoring the source of water. If a gutter leaks above your repair, fix the gutter or add a diverter. Otherwise, the repair will fail again.
- Using interior products outside. Interior patching compounds cannot handle weather. Save them for indoor trim.
Sustainability and Safety Considerations
Exterior repairs create dust and often involve chemicals. Protect your lungs with a respirator when sanding, and keep pets and kids away from dusty areas. Dispose of solvent-soaked rags safely in a sealed metal container, since they can self-heat. Choose low-VOC products when possible, especially for large projects.
From a sustainability perspective, repairing wood with an exterior-grade filler extends the life of your materials and reduces waste. Replacing only what is truly beyond saving, and repairing the rest, is a budget-friendly and eco-conscious choice.
Frequently Asked Questions
What is the difference between wood filler and wood putty for exterior use?
Wood filler cures hard and is sandable and paintable, ideal for shaping and structural repairs. Wood putty often remains slightly flexible and is used after finishing for small touch-ups. For exterior paint-grade work, a true exterior wood filler is what you want. For moving joints, use exterior caulk.
Can I screw into an area repaired with filler?
Water-based and solvent-based fillers are not ideal for anchoring screws. Epoxy can handle light duty if you predrill, but whenever possible, anchor screws into real wood. If a screw must go into a repaired area, epoxy is your best bet.
How do I know if the wood is too far gone for filler?
Probe the area with an awl. If more than about one third of the thickness is soft, consider replacing the piece or using a combination of wood prosthetics and epoxy. Structural parts like stair stringers or load-bearing columns may require a professional assessment.
Will my repair be visible after painting?
A well-feathered, sanded, and primed repair should disappear under two coats of quality exterior paint. The key is surface prep, smooth sanding, and primer that equalizes porosity so the sheen is uniform.
How long will an exterior filler repair last?
With good prep, primer, paint, and controlled water exposure, a repair can last many years. Epoxy repairs, especially on sills and thresholds, often outlast the surrounding wood as long as paint and caulk are maintained.
Bringing It All Together
If you remember nothing else, remember this: match the product to the problem. For tiny nail holes and surface smoothness before paint, a water-based wood filler exterior formula is fast and user friendly. For moderate gouges that need a durable, sandable fix, a solvent-based filler for exterior wood is a smart, cost-effective choice. For rot and deep repairs, epoxy is the best exterior wood filler for long-term performance.
The rest is method. Remove all soft material, dry thoroughly, consolidate if needed, fill with intention, sand smoothly, prime with a reliable exterior primer, caulk moving joints, and finish with two coats of quality exterior paint. Keep your materials stored properly so they are ready when you are, and test anything suspect before trusting it on your home.
Done right, these repairs shrink your to-do list, polish your curb appeal, and protect your home from the elements. And honestly, there is nothing like stepping back from a freshly painted window frame that used to be a mess of cracks and soft wood, and seeing a clean, solid, just-like-new finish. It is satisfying, practical, and a little bit addictive.
If you enjoyed this article, don’t forget to save it on Pinterest or share it with a friend!