
Introduction
If you have been eyeing a quick, beautiful upgrade for your bath, drop in bathroom sinks might be the easiest win. This beginner friendly fixture delivers a fresh look without a full gut renovation, and it pairs perfectly with most vanities. In this guide I will share everything I have learned about choosing a drop in bathroom sink, comparing bathroom sink dimensions, and walking you through bathroom sink installation with confidence.
Whether you are updating a guest bath for holiday visitors or giving your primary suite a glow up, drop in bathroom sinks are a budget smart, style forward choice. Grab a cup of coffee, take a breath, and let’s turn your bathroom into a space you truly love.
Overview of Drop In Bathroom Sinks
A drop in bathroom sink, sometimes called a self rimming or top mount sink, sits into a cutout in your countertop. The rim rests on top, creating a neat border and an easy seal. Because the sink drops in from above, installation is typically straightforward, even for first time DIYers.
This style offers broad compatibility with laminate, wood, tile, and solid surface counters. You can replace an old basin in an afternoon, reuse your existing vanity, and skip the stress of precision undermount hardware. If you want instant gratification, bathroom sinks drop in sink designs are your friend.
Importance of Style and Functionality
Function is the backbone of a good bathroom, but style is what makes you smile every time you turn on the faucet. The right sink should fit your daily routine, feel durable in your hands, and look great with your mirror, lighting, and hardware. A well chosen drop in bathroom sink elevates both form and function, boosting home value and daily satisfaction.
Think of your sink as the handshake of your bathroom. It is the first touchpoint when you enter the space. It should feel solid, easy to clean, and sized to your life. Once you get the balance right, everything else, from hand soap to fresh towels, feels more intentional.
Popular Styles of Drop In Bathroom Sinks
Modern Designs

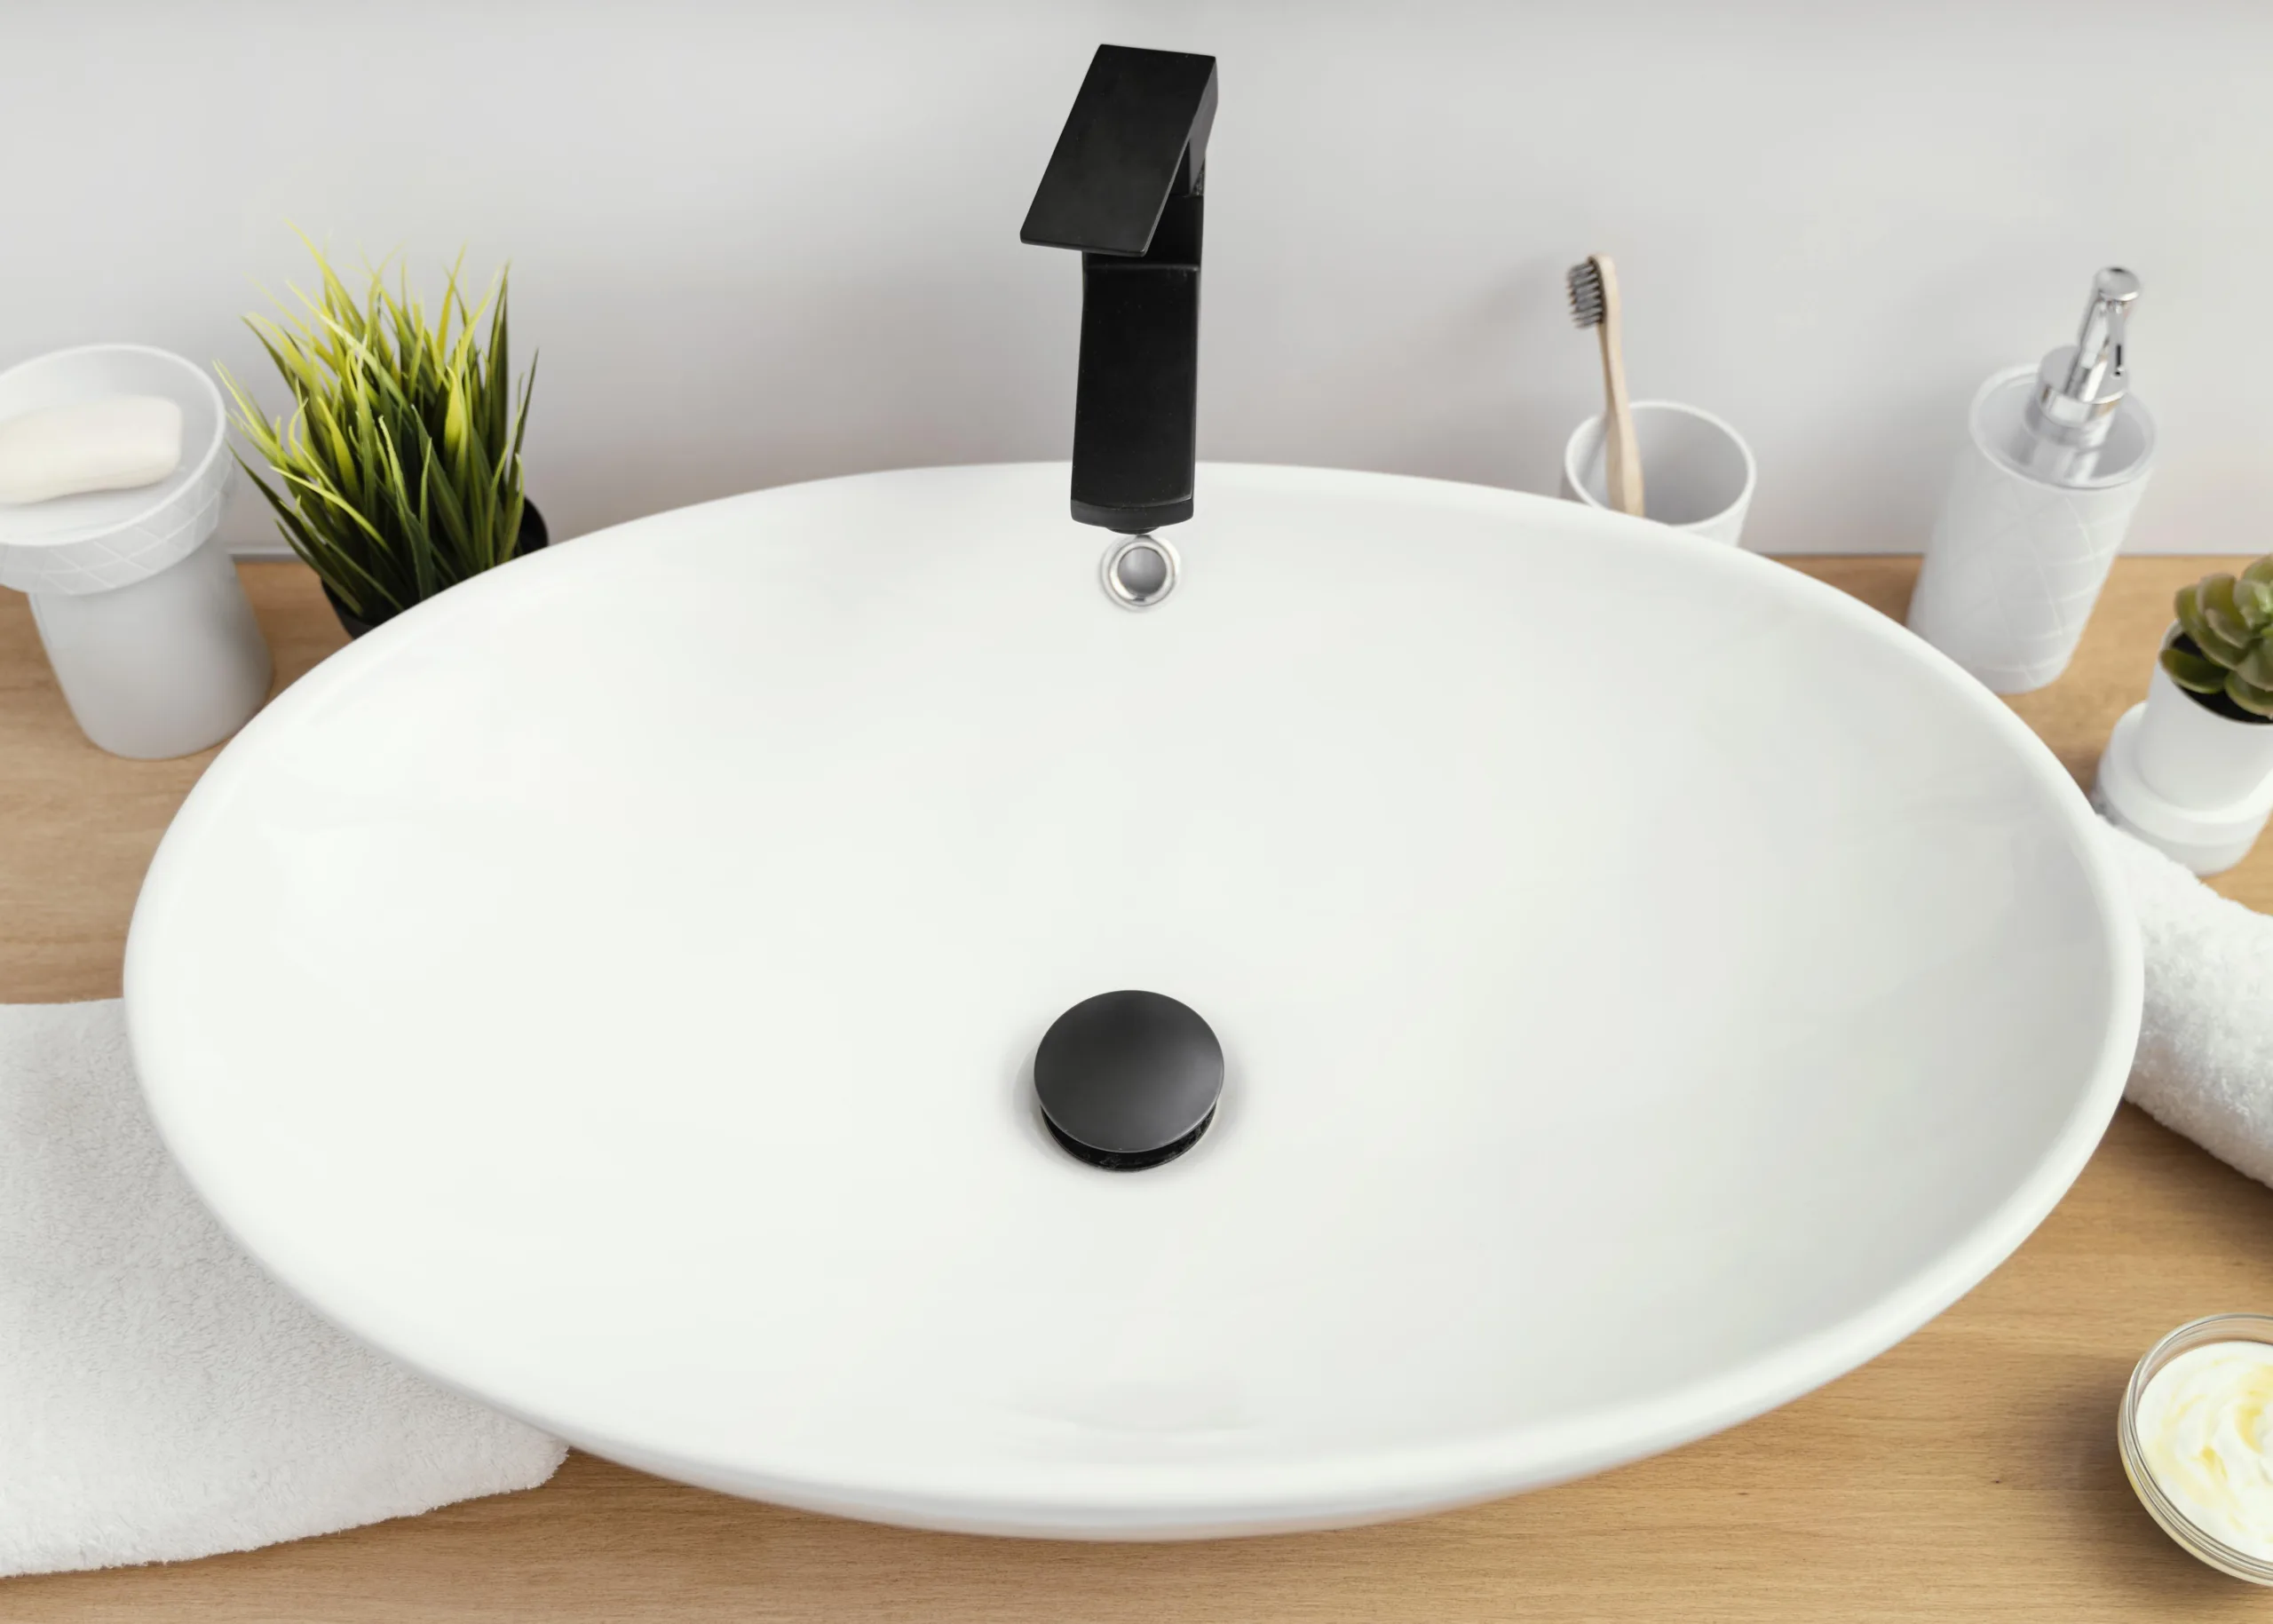
Modern drop in bathroom sinks embrace clean lines and minimal fuss. Rectangular basins with slim rims create a crisp, gallery inspired look. Matte finishes show fewer fingerprints, and integrated overflow details keep water where it belongs.
Try a white vitreous china rectangle paired with a single hole faucet in brushed nickel. The contrast feels hotel worthy without screaming for attention. If you want to push into a designer vibe, look for low profile rims, angular corners softened with a radius edge, and a faucet set that mirrors the geometry.
Pair with a floating vanity or slab front cabinet, a crisp quartz countertop, and a backlit mirror. Add matte black pulls, and your modern bath suddenly looks like a boutique suite in Downtown LA.
Rustic Options
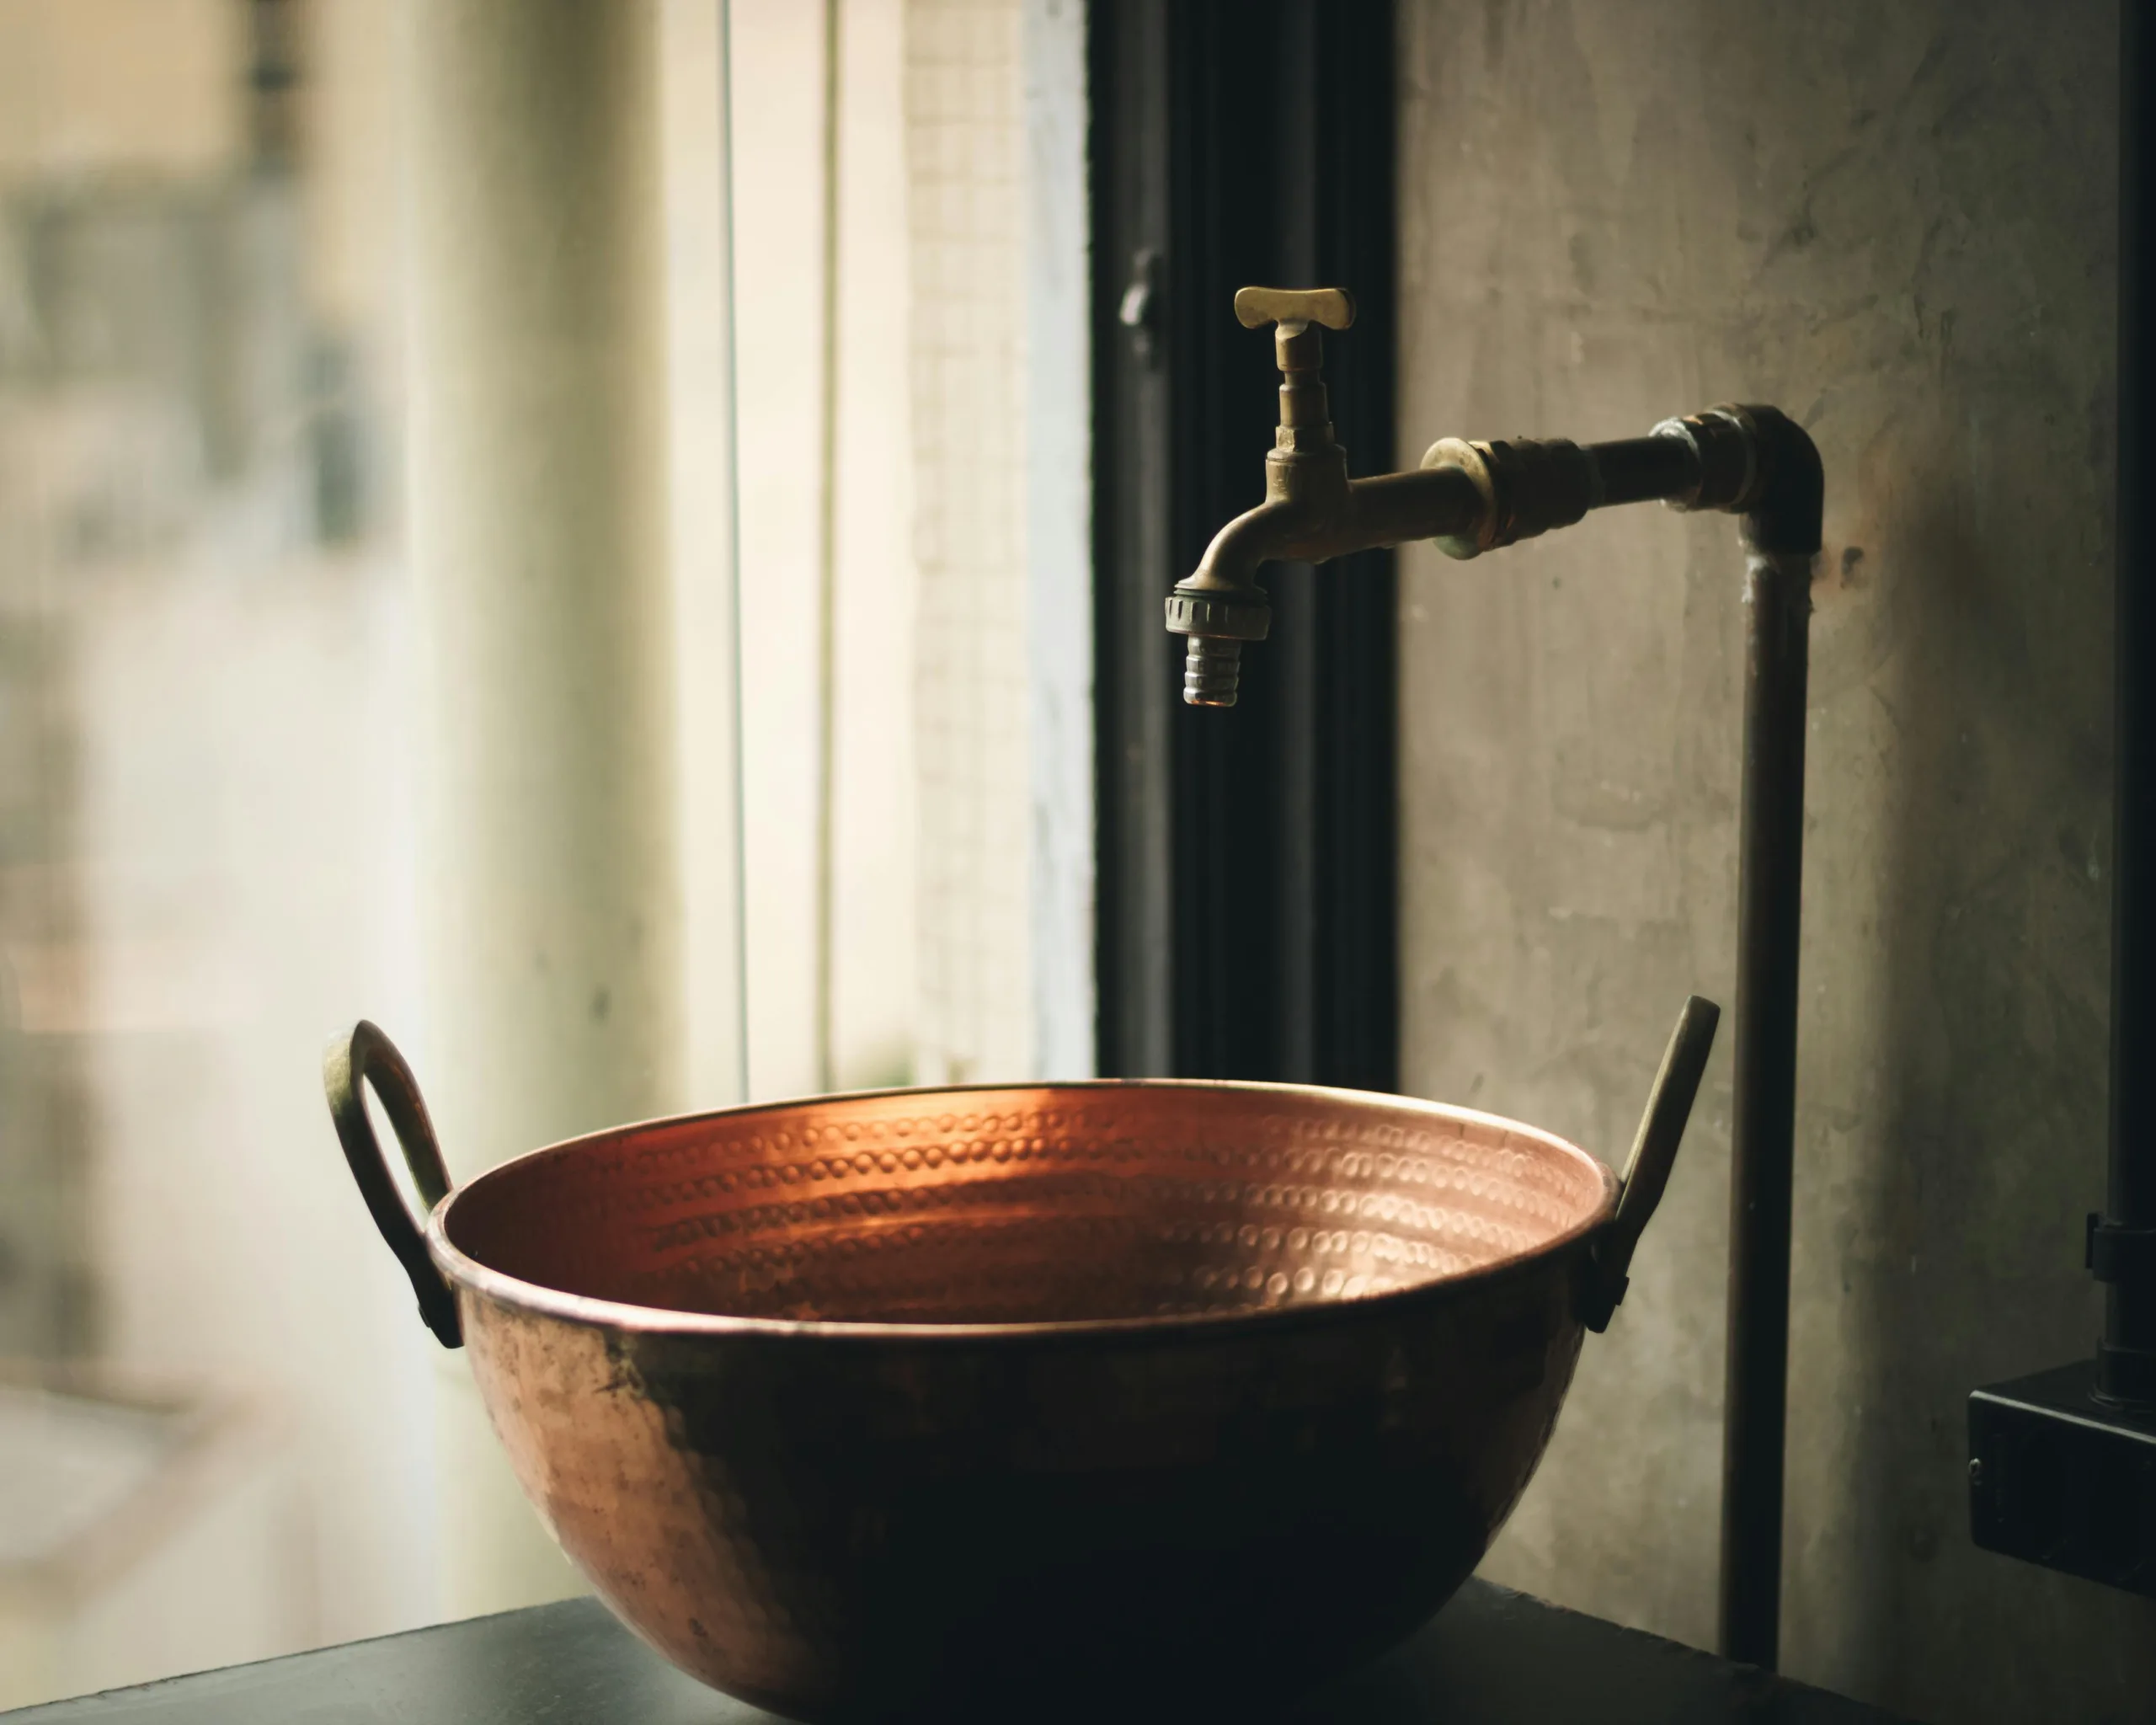
If your heart leans cozy, rustic drop in bathroom sinks can bring natural warmth to a space that sometimes feels sterile. Think hammered copper with a living finish that patinas gracefully, or thick rimmed fireclay that looks hearty and handmade. Rustic does not mean rough. It means textures that tell a story.
Set a round copper drop in basin into a reclaimed wood vanity, and anchor it with oil rubbed bronze hardware. Or try a creamy fireclay sink against butcher block counters for farmhouse charm. A seeded glass sconce, striped hand towels, and a woven bath rug complete the look. The vibe is Sunday morning pancakes, not showroom perfect.
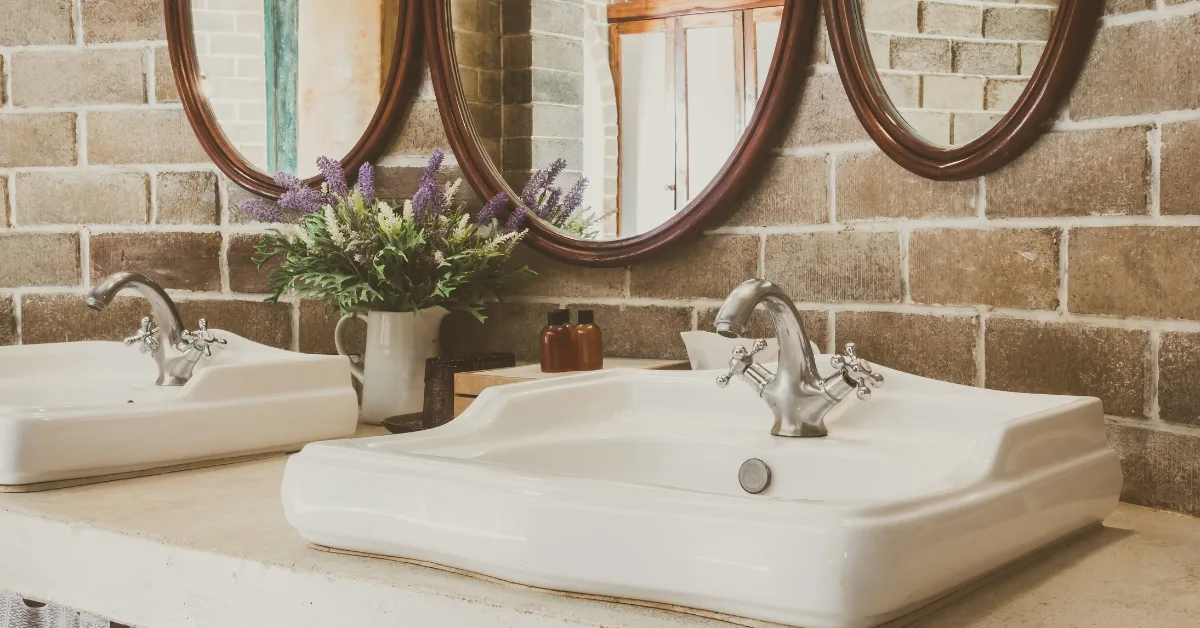
Vintage Appeal
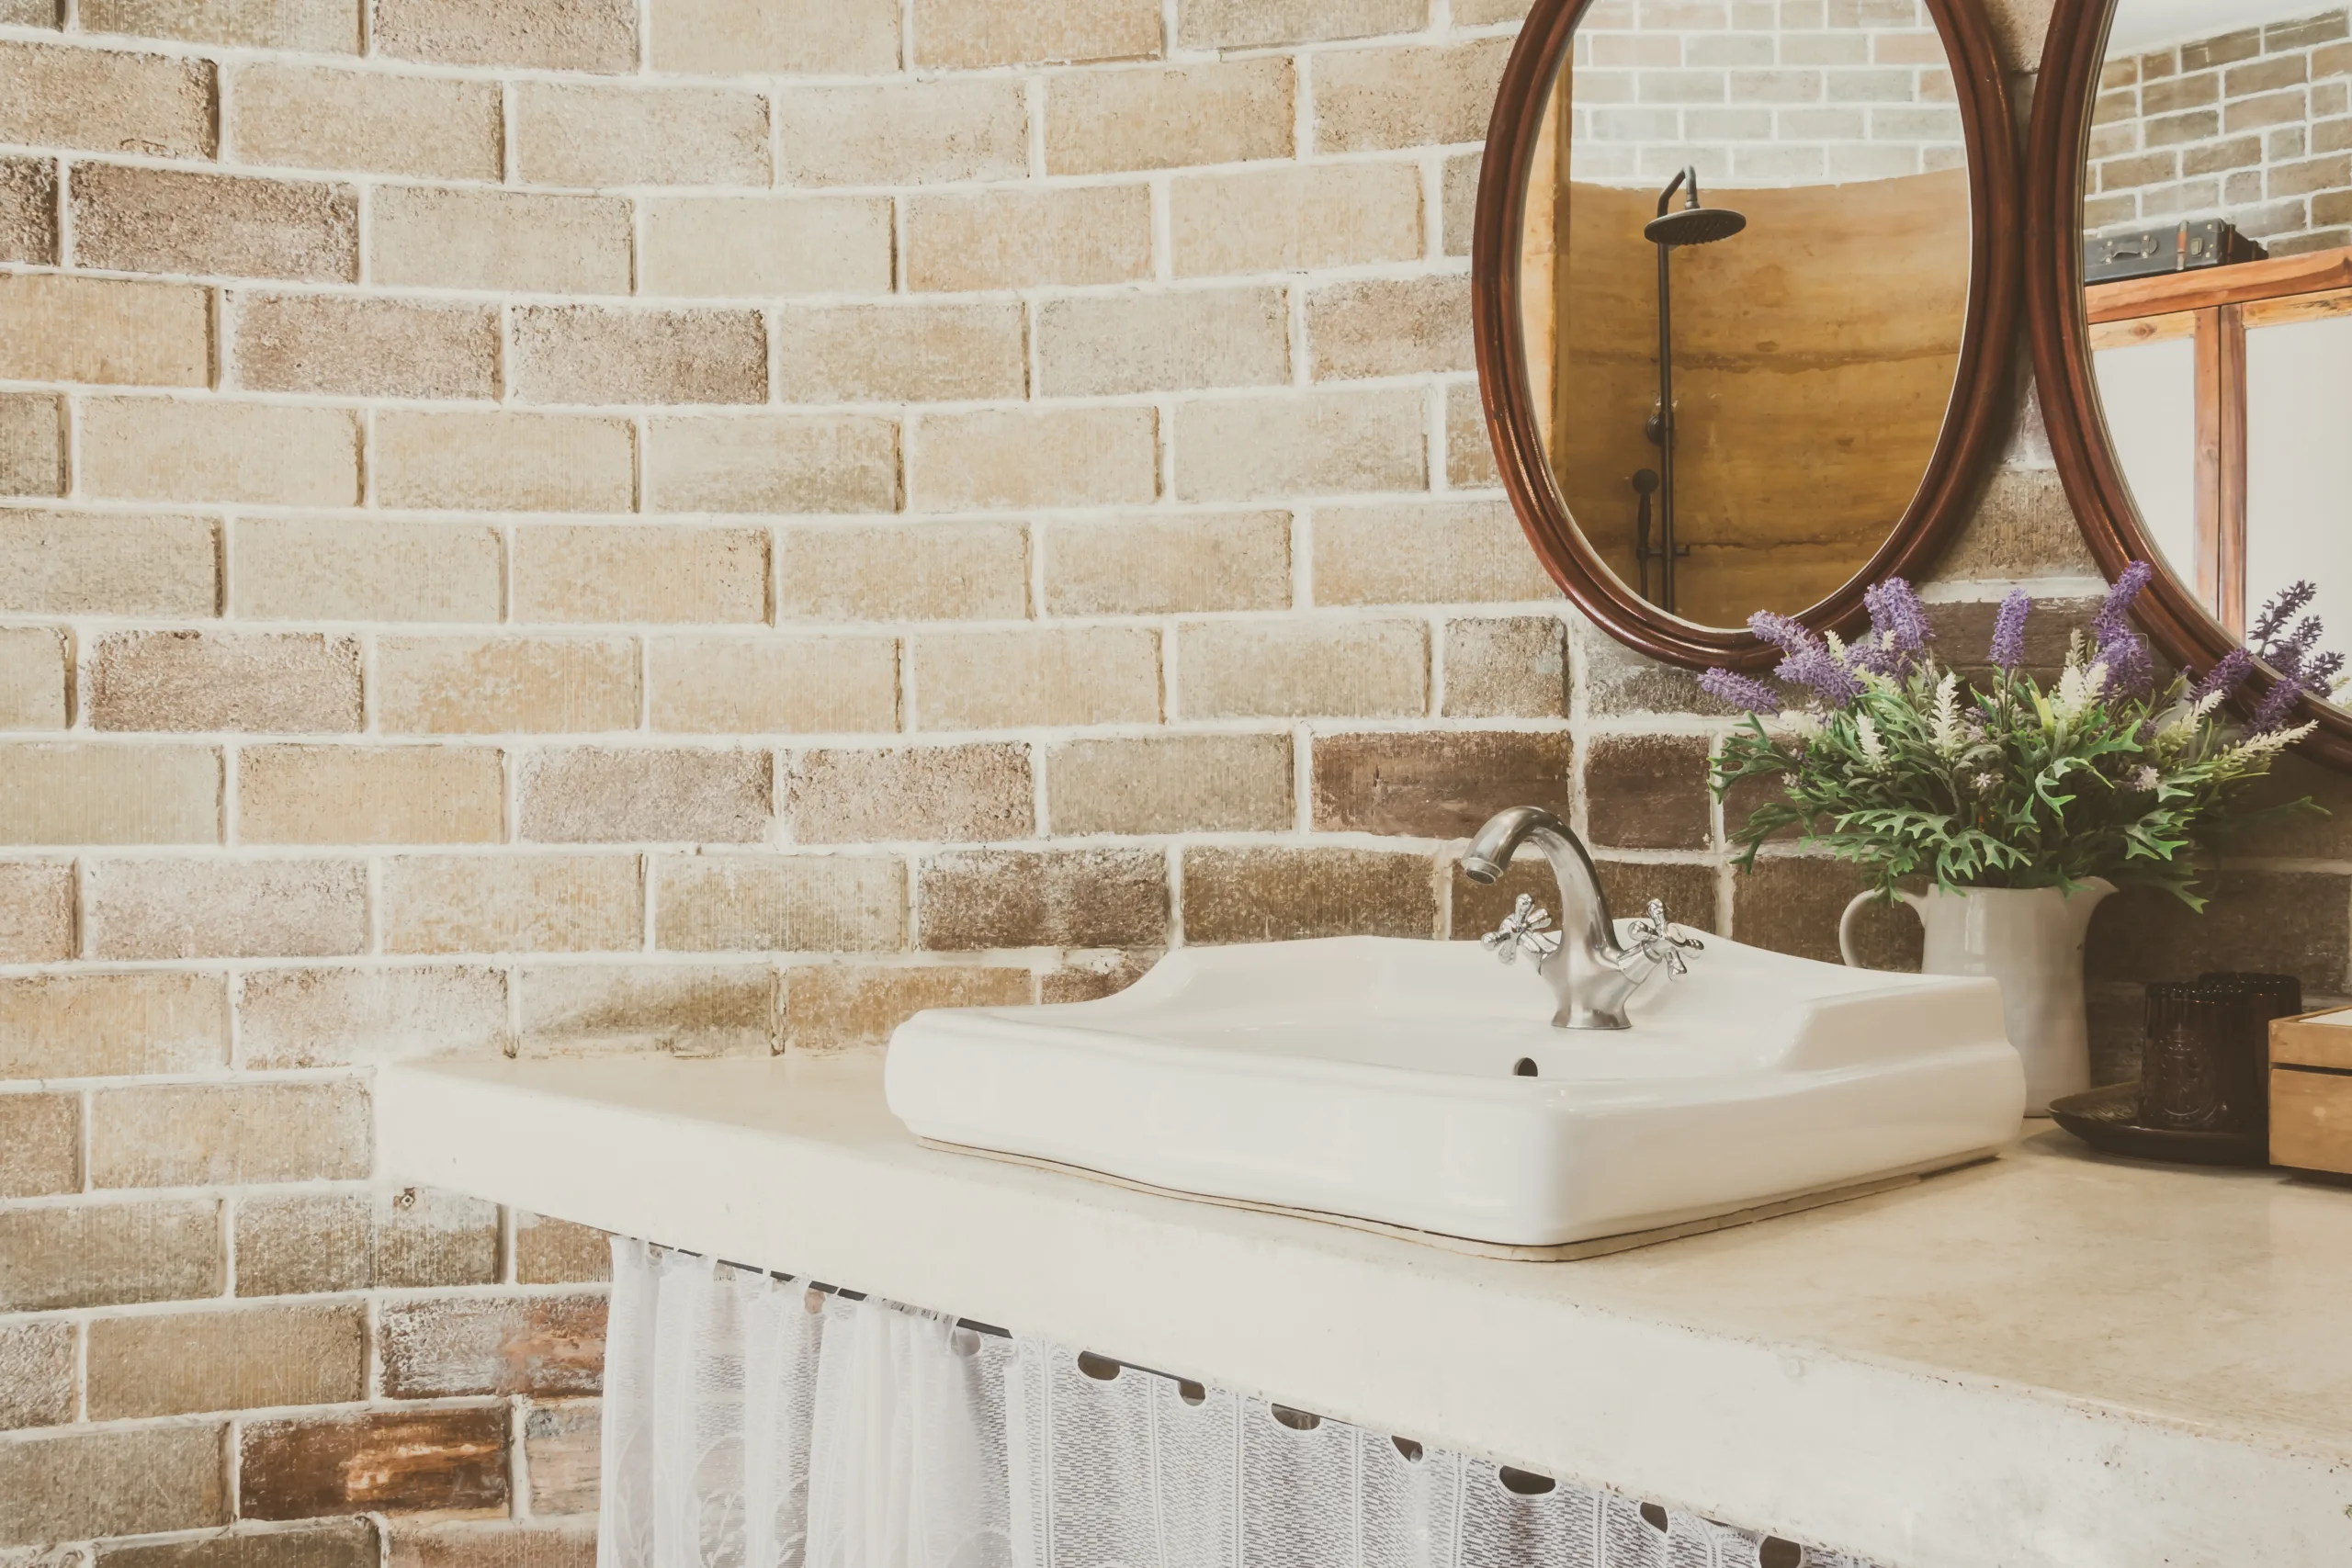
Vintage inspired drop in bathroom sinks deliver a dash of nostalgia. Oval basins with generous rolled rims nod to mid century classics, while polished chrome cross handle faucets keep the mood timeless. Consider pastel colors like pale blue or soft pink if you are honoring a 1950s bungalow, or stay with elegant white and let the faucet be the star.
To deepen the vintage mood, layer in beadboard, black and white hex tile, and a pivot mirror. A small pedestal tray for perfume bottles and a glass canister for cotton swabs adds old school sweetness. It is practical, pretty, and a joy to use every day.
Key Considerations for Choosing a Drop In Bathroom Sink
Bathroom Sink Dimensions
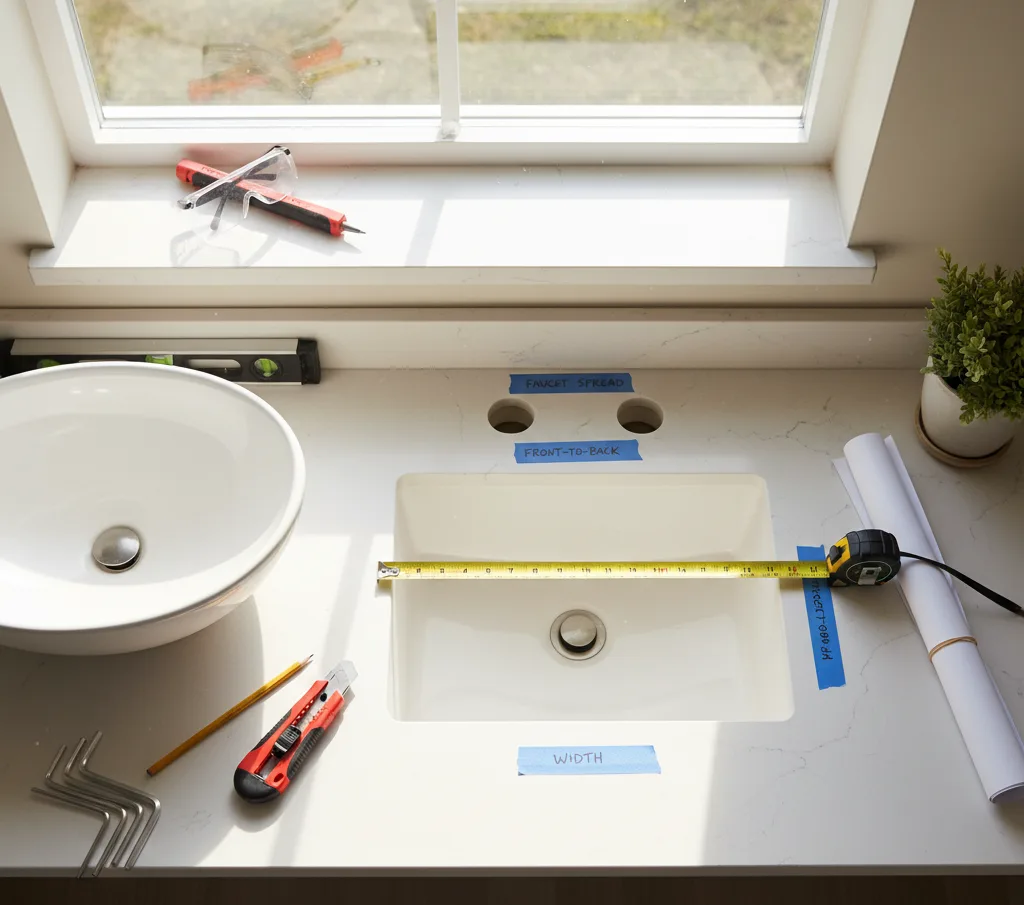
Size is everything. Before you fall in love with a design on your screen, measure your existing vanity and note your bathroom sink dimensions. Most vanities in the U.S. are 18 to 22 inches deep. Standard drop in sink widths range from 16 to 25 inches for a single bowl, and typical front to back dimensions range from 13 to 19 inches. If you are replacing a sink, you will likely reuse the existing cutout or expand it slightly.
Key measurements to gather:
- Counter depth and available width between side walls or drawers
- Existing cutout size, measured at the longest and widest interior points
- Faucet configuration: single hole, 4 inch centerset, or 8 inch widespread
- Clearance to backsplash and faucet lever reach
- Cabinet interior space for the bowl and plumbing trap
Tip: Tape off the outline of your new sink on the counter to visualize scale. If the vanity is small, choose a narrower rim or an oval bowl to preserve counter space for soap and skincare. For a kids bath, a wider rim helps catch toothpaste splatters and gives little hands a place to perch.
Material Choices
Materials impact durability, price, and cleaning ease. Here are the most popular options for drop in bathroom sinks and how they behave in real life.
- Vitreous china: The classic choice. Non porous, glossy, and resistant to stains and scratches. Easy to clean with mild soap. Great for high traffic bathrooms and rentals.
- Porcelain over steel: Lightweight, budget friendly, and sturdy. The porcelain coating is smooth and bright. Avoid harsh abrasives to prevent dulling the finish.
- Fireclay: Thick, artisanal, and wonderfully smooth. Fireclay resists chips and stains, making it ideal for family baths. It brings a higher end look without being fussy.
- Cast iron with enamel: Hefty and luxurious. The enamel coating is glassy and deep. Cast iron keeps water warmer a touch longer, which feels spa like. Weighty install, so confirm your vanity can handle it.
- Copper: Naturally antimicrobial and visually stunning. Expect a living finish that evolves. Use gentle cleaners and avoid leaving toothpaste or acidic products to sit.
- Solid surface or resin: Seamless look with matte options. Repairable with fine sanding if lightly scratched. Modern and minimalist.
- Natural stone: Marble or granite drop in bathroom sinks look elegant but need sealing and careful cleaning. Great for powder rooms where wear is lighter.
Choose based on your lifestyle. For a busy household with kids, vitreous china or fireclay is often best. For a statement powder room, copper or stone turns heads instantly.
Color and Finish Options
White remains the most versatile and resale friendly, but color has returned in a big way. Soft neutrals like biscuit, almond, and pale gray harmonize with warm wood vanities and brass hardware. Bold choices like matte black or deep navy can feel tailored and masculine, especially with a ribbed or fluted exterior profile.
If you love metallics, copper and hammered nickel catch the light beautifully. They pair well with warm LED bulbs and natural textures like rattan and linen. For a modern aesthetic, try matte white or greige paired with a concrete look counter and brushed stainless faucet. The finish should feel cohesive with your cabinet hardware and mirror, not matchy matchy, just friendly.
Pro tip: When in doubt, stick with white for the sink and let your faucet or backsplash be the color moment. White reads clean in photos, which is great for Pinterest and resale, while a trendy faucet can be swapped in minutes.
Installation Tips for Drop In Bathroom Sinks
Tools Required for Bathroom Sink Installation
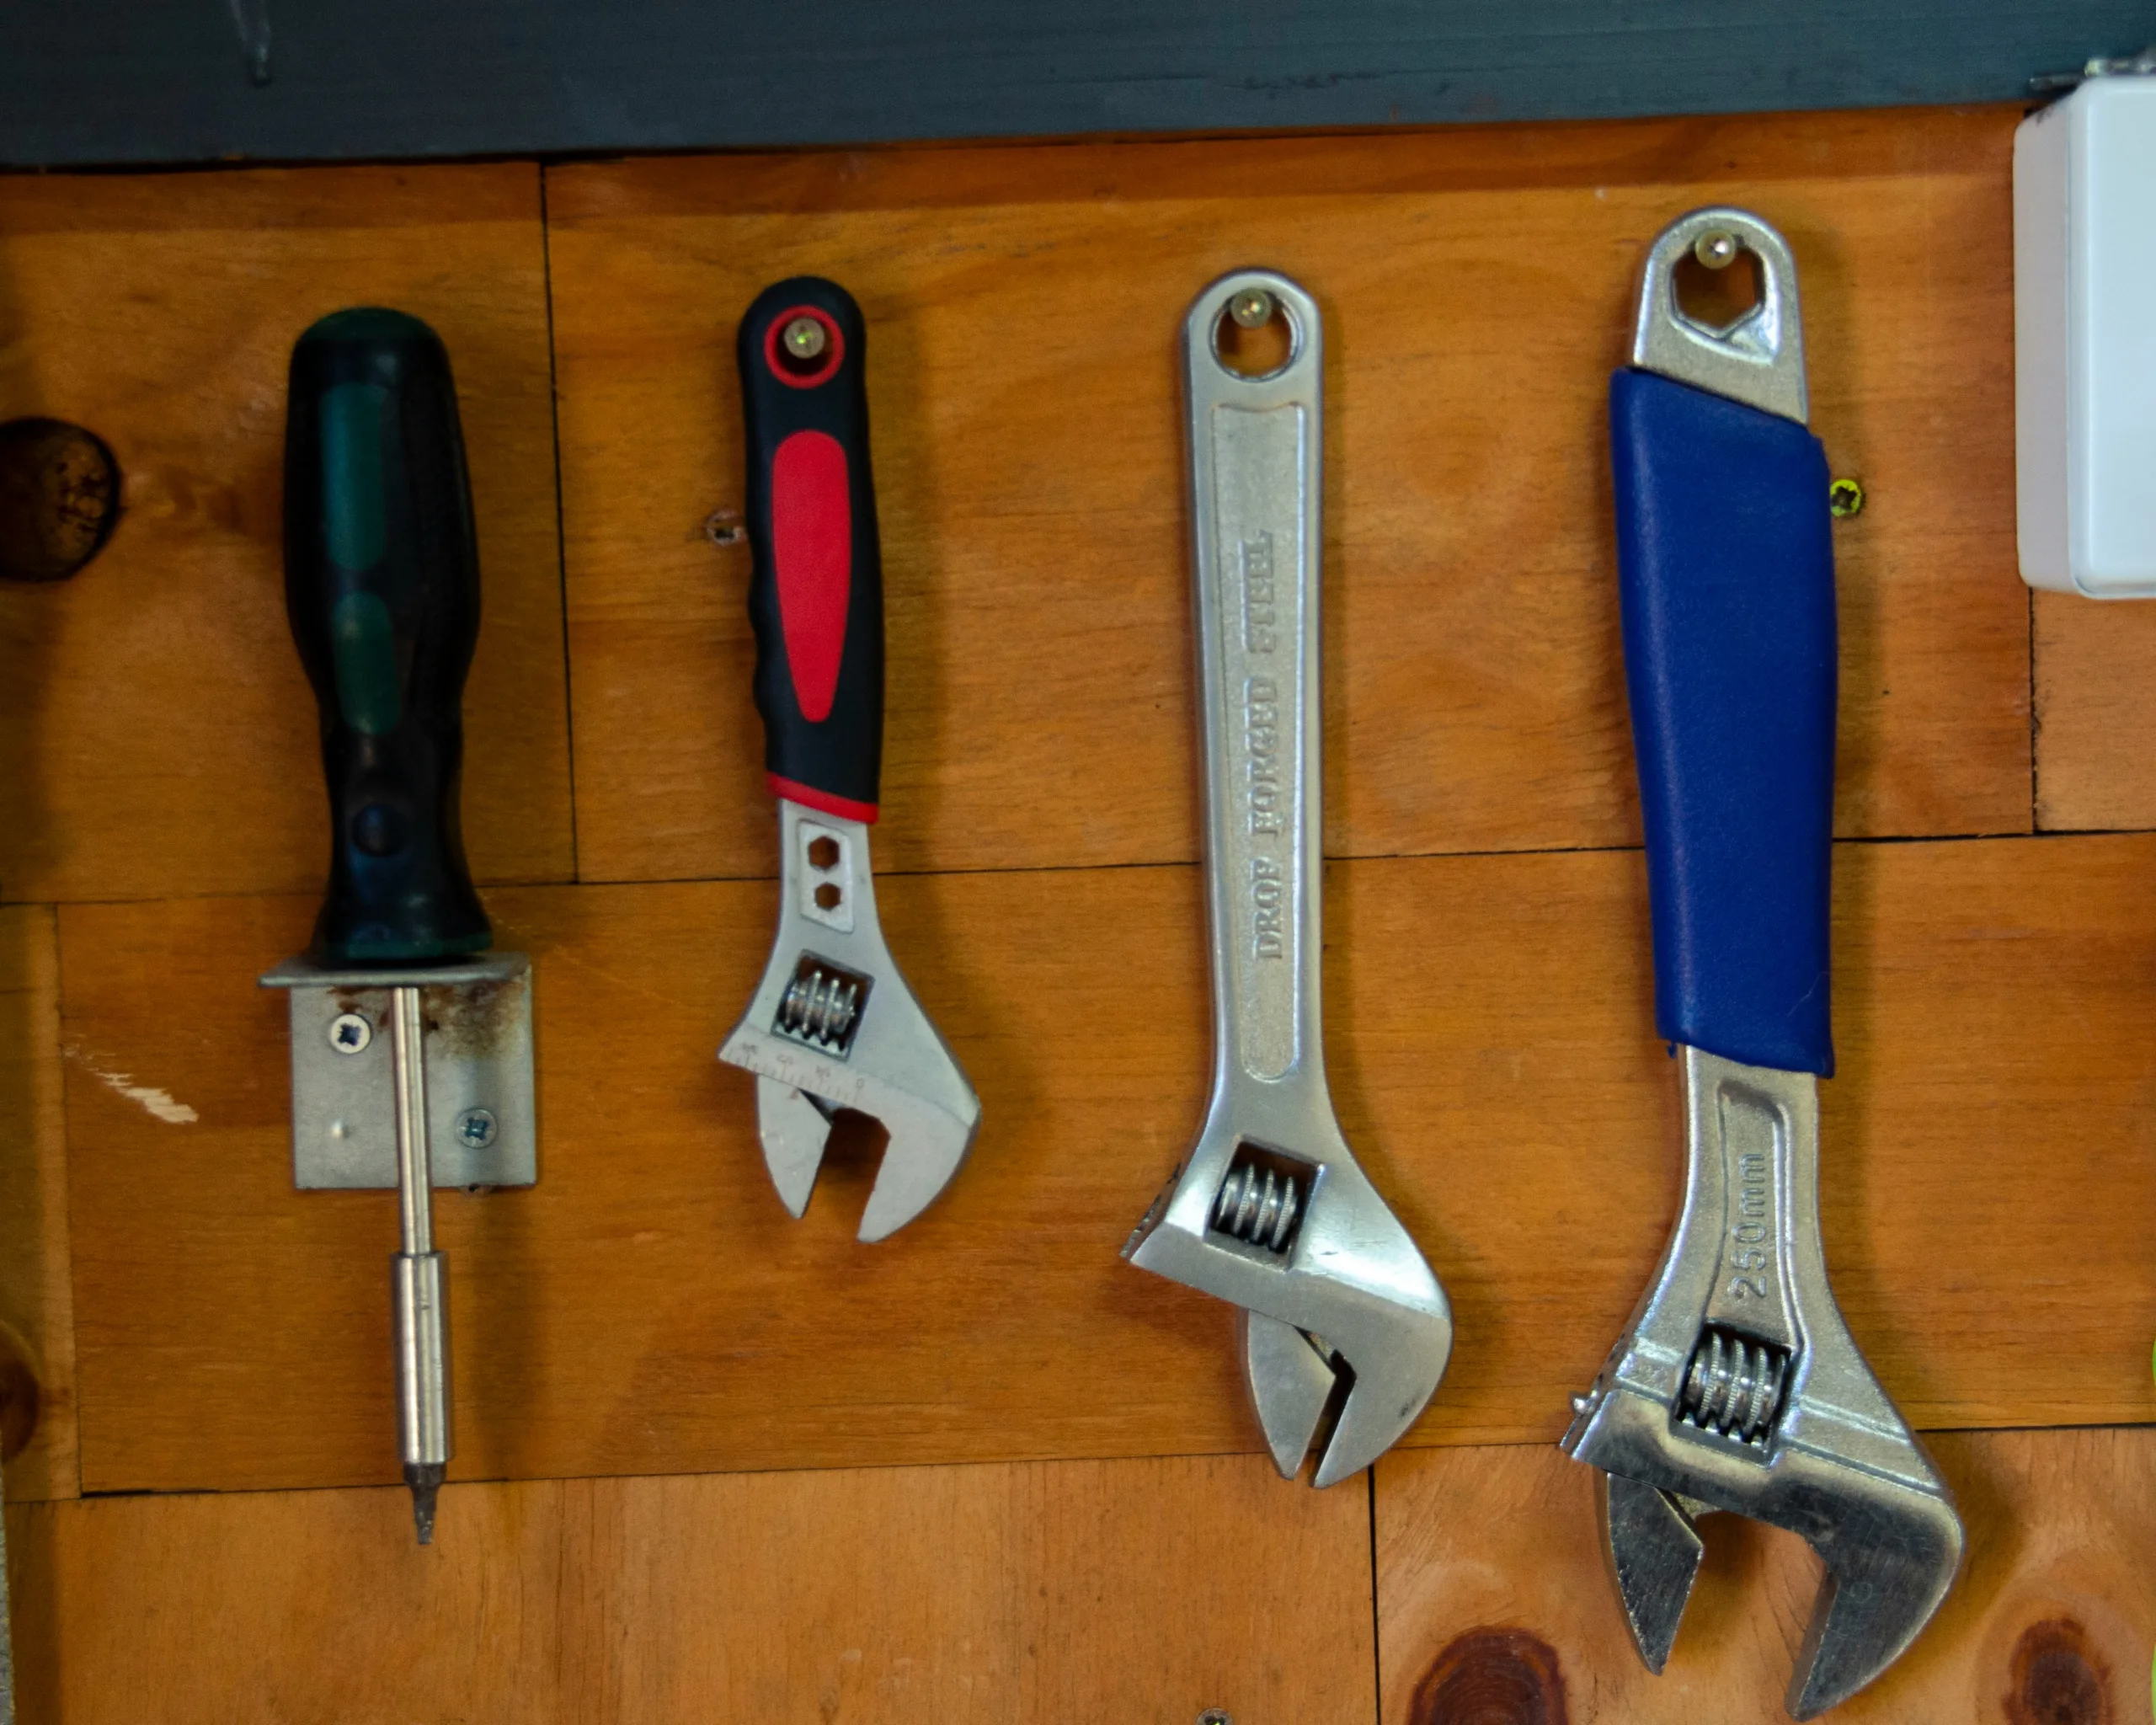
You do not need a full workshop to install a drop in bathroom sink. A well packed toolkit makes the process smooth and satisfying.
Here is what to have on hand:
- Adjustable wrench and channel lock pliers
- Basin wrench for tight spaces behind the bowl
- Plumber’s putty or silicone sealant rated for kitchen and bath
- Tape measure, pencil, and painter’s tape
- Jigsaw or oscillating multi tool for new cutouts
- Hole saw if you need to add faucet holes
- Screwdriver set and utility knife
- Level and straightedge
- Bucket, rags, and a small sponge
- Supply lines, P trap kit, and Teflon tape
- Safety glasses and work gloves
If you are swapping a sink into an existing cutout, you might only need wrenches, sealant, and patience. For a brand new countertop, confirm the template and cutout with your fabricator before delivery.
Step-by-Step Installation Guide
Follow these calm, clear steps for a no drama bathroom sink installation. Read through once before you begin so you know where you are headed.
Shut off water Locate the hot and cold shutoff valves under the sink. Turn the handles clockwise until snug. Open the faucet to relieve pressure. Place a bucket under the P trap to catch any water.
Disconnect plumbing Loosen the supply lines from the shutoff valves using an adjustable wrench. Remove the P trap by loosening the slip nuts. Keep a rag handy for drips.
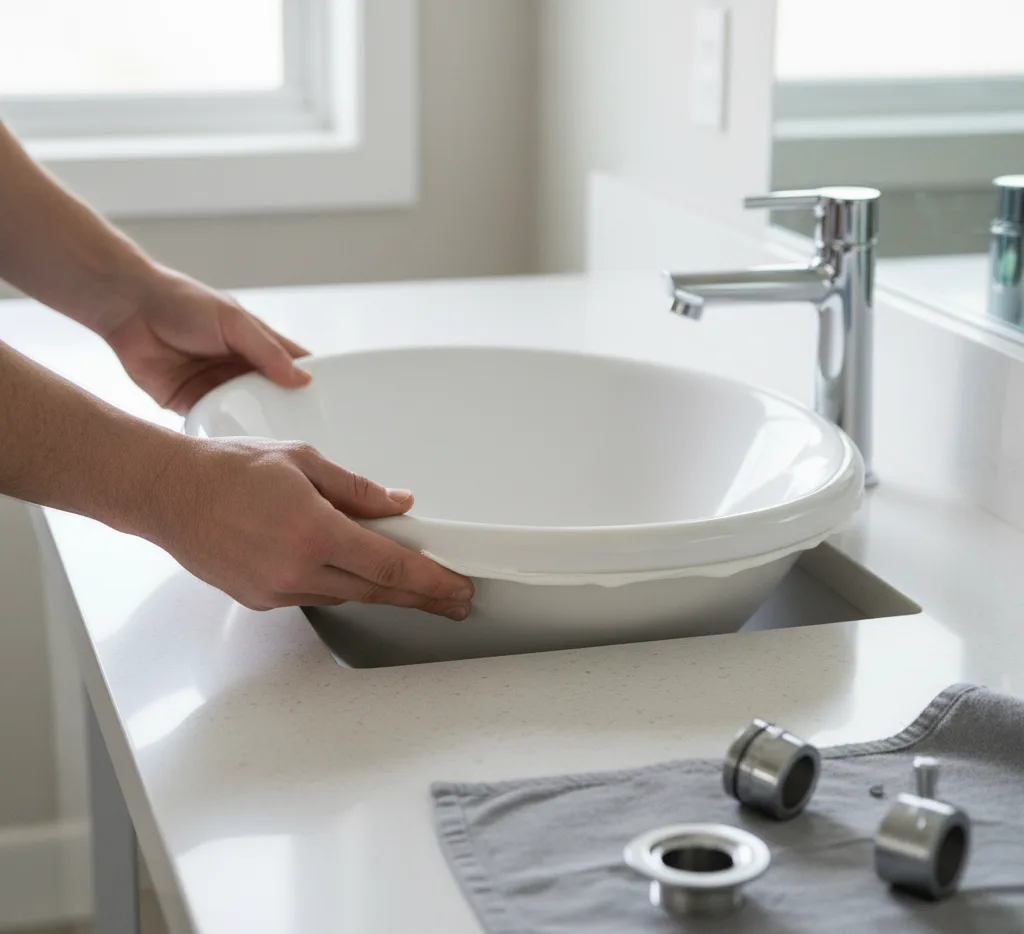
Remove the old sink Cut any silicone caulk around the rim with a utility knife. If clips are present under the counter, loosen them. Lift the old sink straight up. Clean the countertop thoroughly, removing old sealant so the new sink sits flush.
Dry fit the new basin Set the new drop in bathroom sink into the opening to confirm the fit. Check that the faucet holes align with your faucet choice and that the rim sits flat without rocking. Adjust the cutout if needed using a jigsaw, working slowly and wearing safety glasses.
Install faucet and drain It is easier to install the faucet and drain assembly with the sink upside down on a towel. Follow the faucet manufacturer’s instructions. Wrap threaded connections with Teflon tape. For the drain, use plumber’s putty under the flange unless the instructions specify silicone. Tighten the locknut while keeping the logo on the drain cap aligned.
Seal and set the sink Run a thin, continuous bead of silicone around the underside of the rim. Carefully lower the sink into the cutout. Press firmly to set. Wipe away any squeeze out with a damp finger and rag. If your sink uses mounting clips, attach and snug them up evenly.
Reconnect plumbing Install new supply lines from the shutoff valves to the faucet. Reassemble the P trap, ensuring the tailpiece from the drain is aligned. Hand tighten slip nuts, then give a gentle quarter turn with pliers. Do not over tighten.
Turn on water and test Slowly open the shutoff valves. Check every connection for leaks. Fill the basin, then release the stopper to test the drain. If you see a drip, tighten a touch more. Level the faucet and sink if needed before the silicone fully cures.
Caulk the rim After everything checks out, run a neat bead of silicone around the top edge where the rim meets the countertop. Smooth it with a damp finger for a clean finish. This keeps water out and protects the counter.
Clean up and style Remove painter’s tape, wipe down fingerprints, and install your faucet aerator. Add a pretty soap pump, a sprig of eucalyptus, and fresh towels. Snap a photo for your project album. You did it.
Time estimate: 1 to 3 hours for a simple swap, longer if you are cutting a fresh opening or relocating plumbing.
Cost considerations: Expect to spend 60 to 300 dollars for the sink, 60 to 250 dollars for a faucet, and 15 to 40 dollars for new supply lines and a P trap kit. If you hire a pro for bathroom sink installation, typical labor ranges from 150 to 350 dollars depending on region and complexity.
Maintenance and Care for Your Bathroom Sinks
Cleaning Tips for Durability
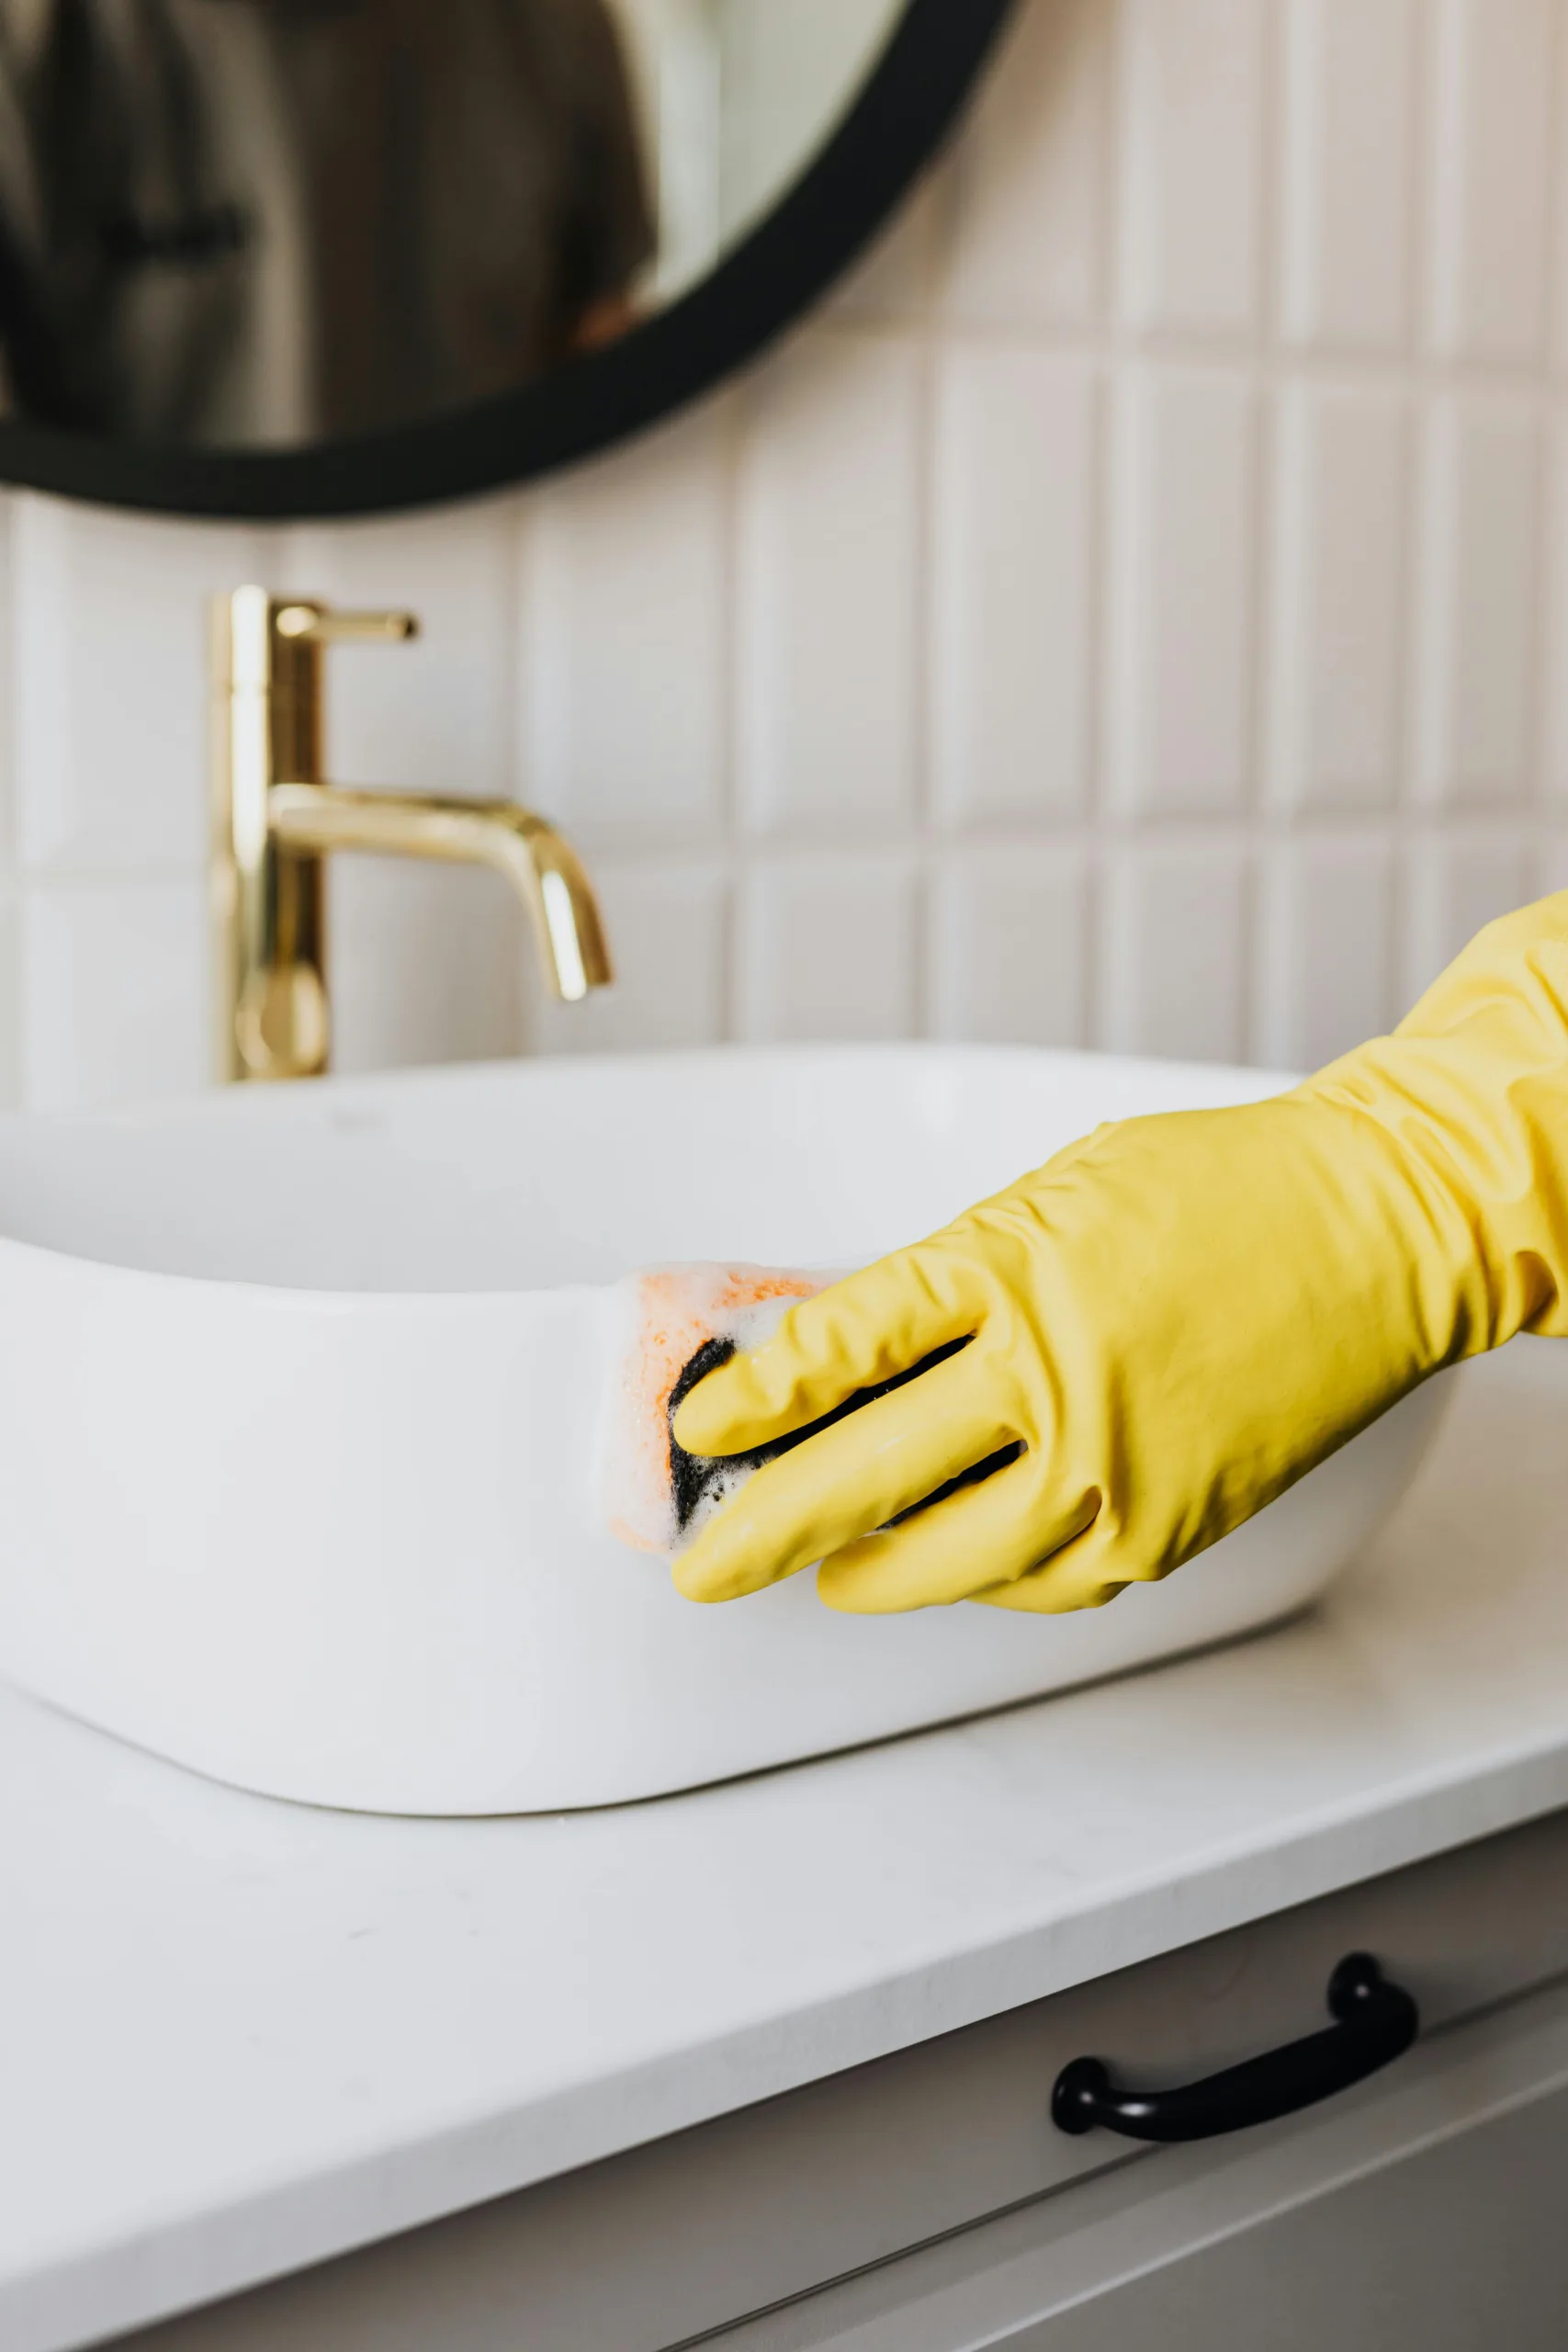
A few smart habits keep your sink looking new and protect your investment.
- Daily wipe down: After brushing teeth or washing hands, a quick swipe with a soft microfiber cloth prevents mineral spots and toothpaste crust. Keep a cloth in the drawer for easy access.
- Weekly clean: Use a gentle dish soap and warm water or a non abrasive bathroom cleaner. Rinse well. For vitreous china and fireclay, avoid scouring powders and steel wool.
- Hard water help: If you have hard water, apply a white vinegar soak to the aerator and around the drain once a month. Rinse thoroughly. A water softener can be a long term upgrade if buildup is constant.
- Disinfecting: A diluted solution of 70 percent isopropyl alcohol or a hydrogen peroxide based cleaner sanitizes without damaging most finishes. Test in an inconspicuous spot first.
- Copper care: For living finish metals, simply wash with mild soap and water. Embrace the patina. If you prefer shine, use a copper cleaner sparingly and wax lightly to slow tarnish.
A clean sink not only looks better, it also protects faucets, seals, and counters from premature wear. Consistency beats intensity. Short, regular cleanups keep everything fresh.
Preventing Damage and Wear
Sinks are tough, but a few avoidable habits cause trouble over time.
- Avoid sudden temperature shock: Do not pour boiling water directly into a cold enamel or stone sink. Run the tap a moment first to temper the surface.
- Skip harsh chemicals: Drain openers and bleach can degrade seals and finishes. Use enzyme based cleaners or a manual drain snake for clogs.
- Protect the rim: Do not stand heavy toiletry caddies on thin rims. Place trays or silicone mats to distribute weight and protect against scratches.
- Maintain caulk and seals: Check the silicone bead around your drop in rim every six months. If you see gaps or mildew, remove and recaulk before water sneaks in.
- Watch for slow leaks: Occasionally open the vanity and feel around supply lines and the P trap. A tiny drip can warp cabinets and invite mold. Early detection saves money.
With basic care, a well made drop in bathroom sink can look beautiful for a decade or more. Treat it kindly, and it will repay you with daily reliability.
Conclusion
Final Thoughts on Transforming Your Space
A fresh sink is one of the highest impact upgrades you can make in a bathroom, especially when time and budget are tight. Drop in bathroom sinks deliver style, flexibility, and an approachable installation that many DIYers can handle in a single afternoon. From sleek modern rectangles to soulful copper bowls and charming vintage ovals, there is a shape and finish that will make your vanity sing.
As you plan, measure carefully and keep your bathroom sink dimensions front of mind. Choose materials that match your lifestyle, and do not be afraid to go classic with white for longevity. When you are ready, follow the step by step bathroom sink installation guide above, move patiently, and test for leaks as you go. The result is a cleaner countertop, a faucet that feels great in your hand, and a mirror moment you will love every morning.
If you are building a whole project board, consider related upgrades like a water saving faucet, a simple tile backsplash, or a dimmable vanity light. These add to the overall experience without breaking the bank. If plumbing makes you nervous, call a licensed plumber near me in your area and ask for a flat rate quote. Peace of mind is priceless, especially when working around wood cabinets and new counters.
Most of all, have fun. Your bathroom should work hard and feel good. With a smart plan and a beautiful drop in bathroom sink, you are closer than you think to a space that looks pulled from your favorite pin. If you enjoyed this article, don’t forget to save it on Pinterest or share it with a friend!